87
Menu Description
Advanced Guide Menu Description
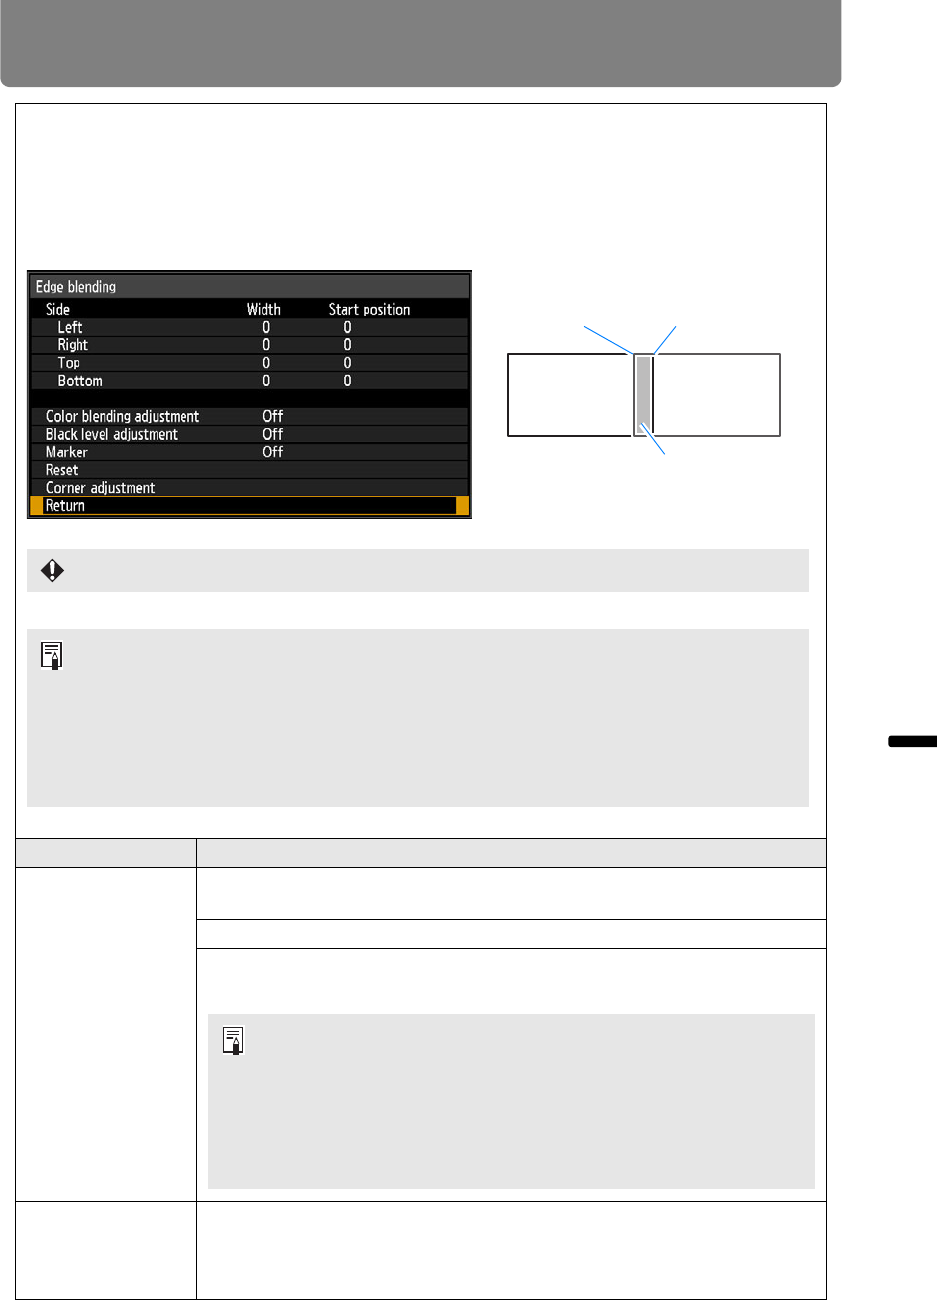
Edge blending
Brightness and colors of overlapping edges of images from multiple projectors, which form a
blending area, can be adjusted for a more seamless appearance. For detailed instructions, see
“Projecting from Multiple Projectors at Once (Edge Blending)” (P151).
[Off] Disable blending.
[Adjust] Display the menu for blending area adjustment.
Option Function
Side
Left, Right,
Top, Bottom
Select the direction of the blending area to adjust.
Width Specify the width between the start and end markers.
Start
position
Moves the position of the start marker.
Color blending
adjustment
Adjust unwanted colors or discrepancies between colors in the blending
area.
Change the [White] value to adjust red, green, and blue together, and
adjust [Red], [Green], and [Blue] values individually.
End marker Start marker
Blending area
Adjustment may not eliminate different colors or brightnesses in the blending area.
For best edge-blending results, use all projectors in the same image mode and make
the following adjustments.
(1) Black, white, and color temperature adjustment, by adjusting brightness, contrast,
R/G/B gain and offset
(2) Color adjustment, by using 6-axis color adjustment
(3) Gamma adjustment, by fine-tuning gamma
(4) Corner adjustment, using keystone correction
• Large blending areas may cover input signal dialog boxes and
other interface elements. In this case, momentarily set edge
blending to [Off] and check the display.
• Although the starting marker is normally aligned with the image
edge, it can also be aligned toward the center of the image. In
this case, the black blending area will lie outside of the starting
marker.
