


17-35
Cisco ONS 15600 Procedure Guide, R8.0
Chapter 17 DLPs E100 to E199
DLP- E143 Install the Wide CRMs
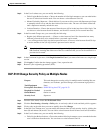
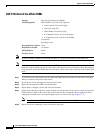
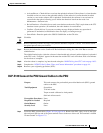
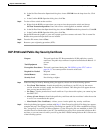
Figure 17-3 CRM Screw Holes (Front)
Step 7 Align the front of the CRM keyholes with the screws and carefully slide the CRM down so it rests on
the screws. Tighten the screws, starting with the bottom screw and proceeding up to the middle and top
screws.
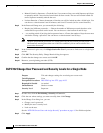
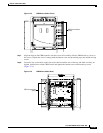
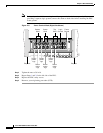
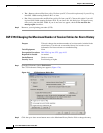
Step 8 Locate the two screw holes on the side of the shelf toward the rear of the bay and make sure they are
aligned with the holes on the CRM. Install and tighten the bottom screw and then the top screw
(Figure 17-4).
Figure 17-4 CRM Screw Holes (Rear)
96609
CRM screw holes
(front)
96609
CRM screw holes
(back)