


8
Chapter 2: Setting up the Hardware
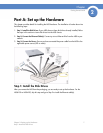
Step 1: Install the Disk Drives
Getting Sarted Guide
Chapter
2
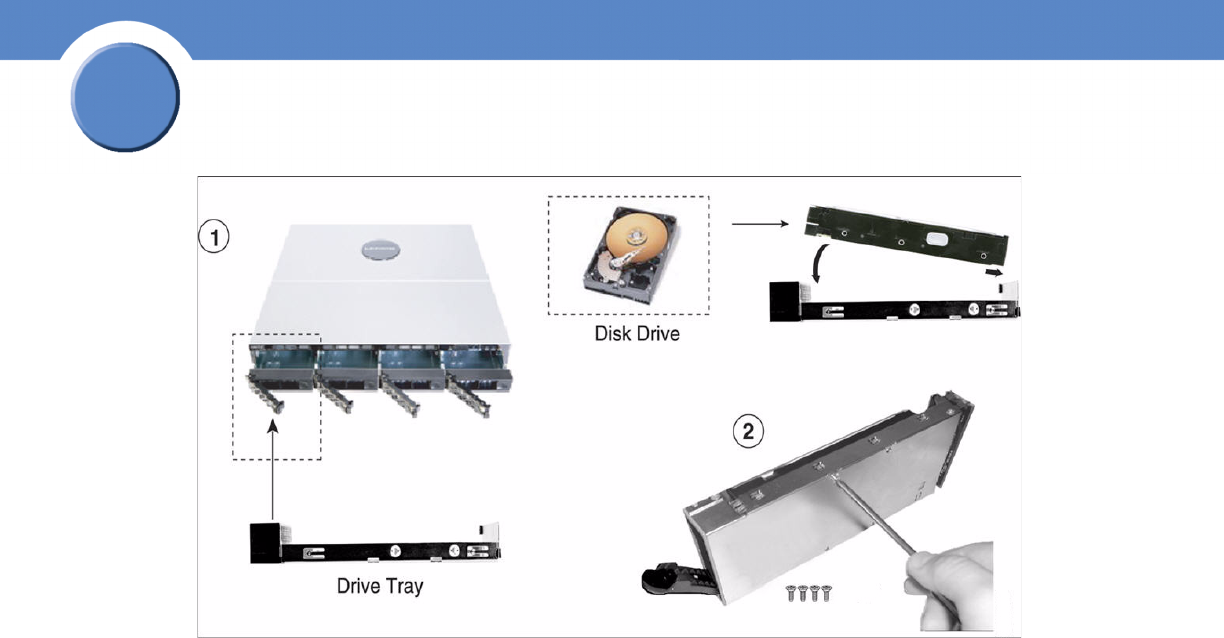
To install the disk drives into the NSS:
1. Remove a disk tray from the front of the NSS chassis by pushing in the tab on the front of the
tray. (There is no recommended order of which tray to remove first.) The disk drives are
numbered from 1 to 4 (left to right) in the front of the chassis.
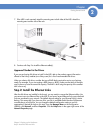
2. Position the disk drive into a disk tray.
3. Using a Phillips screwdriver, either screw in two screws on each side of the disk tray to the disk
drive, or screw in the four screws on the bottom of the disk tray to the disk drive.
4. Apply even pressure to the both corners of the tray while you insert the tray fully into position in
the chassis.
5. When the disk drive is inserted all the way in, close the latch on the disk drive tray.
6. Repeat steps 1 to 5 for each disk drive you want to install.