


33
Chapter 3: Configuring the Network Storage System
(NSS)
Getting Started Guide
Chapter
3
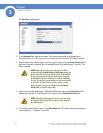
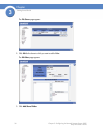
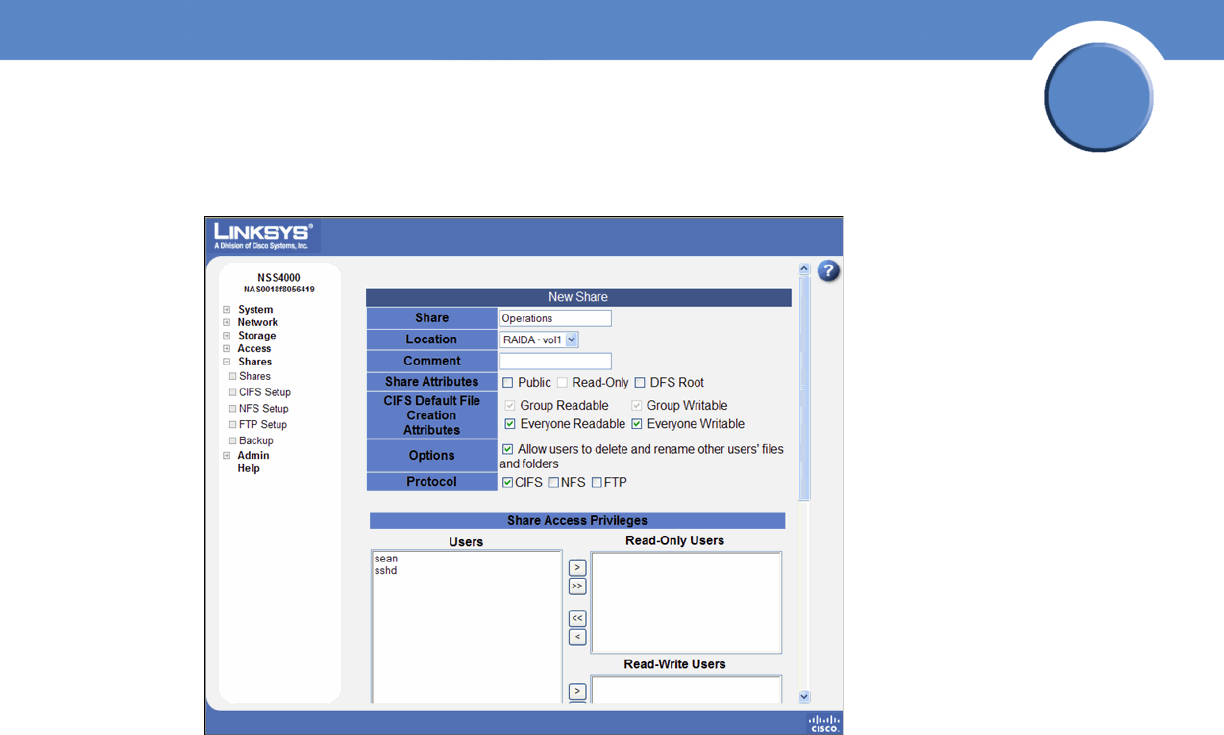
The New Share page appears.
3. In the Share field, enter a name for the share.
4. From the Location field, select the volume on which you want to configure the share.
5. Add a description or comment about the share in the Comment field. This comment appears
when you browse the NSS from My Network Places (as the tooltip when you hover over the
share, or if you select the Details viewing mode). This field is optional.
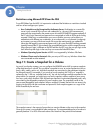
6. Click the Share Attributes options to configure the share as public and if public, read-only.
(These settings are optional.)
• Public: Enable all users to access the share. To make an NFS share world readable/writable,
select this checkbox, and ensure the Read-Only checkbox is also deselected. To make an NFS
share world readable, select this checkbox, and ensure the Read-Only checkbox is also
selected.
• Read-Only: If the share is configured as a public share, allow the users read-only access to
the share. Users can access and view the share but cannot write to the share. (For NFS
shares, refer to the information stated in the Public field.)