


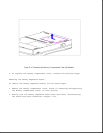


Removing the CPU Cover
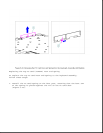
To remove the CPU cover for replacement, follow these steps.
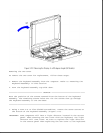
1. Remove the keyboard assembly from the computer. Refer to "Removing the
Keyboard Assembly" in this section.
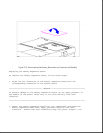
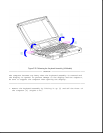
2. Turn the keyboard assembly top-side down.
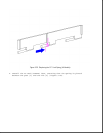
>>>>>>>>>>>>>>>>>>>>>>>>>>>>>>>>> CAUTION <<<<<<<<<<<<<<<<<<<<<<<<<<<<<<<<<
Note the position of the screws removed from the bottom of the keyboard
assembly. The remaining screws holes are for the screws that go through
the keyboard assembly to the CPU base.
>>>>>>>>>>>>>>>>>>>>>>>>>>>>>>>>>>>>><<<<<<<<<<<<<<<<<<<<<<<<<<<<<<<<<<<<<<
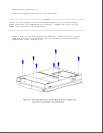
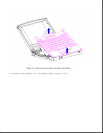
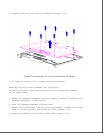
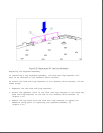
3. Using a Torx T-8 or flat-bladed screwdriver, remove the seven screws on
the bottom of the keyboard assembly (Figure 3-23).
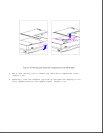
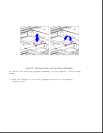
IMPORTANT: Some computers will have a light director located in the status
panel. When removing the CPU cover from the keyboard, the light
director will come loose. Be sure to replace the light director
in the status panel when replacing the CPU cover to the keyboard.