


Chapter 5 Configuring The Internal Ethernet Adapter For Novell
176
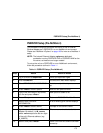
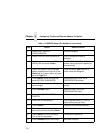
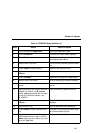
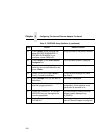
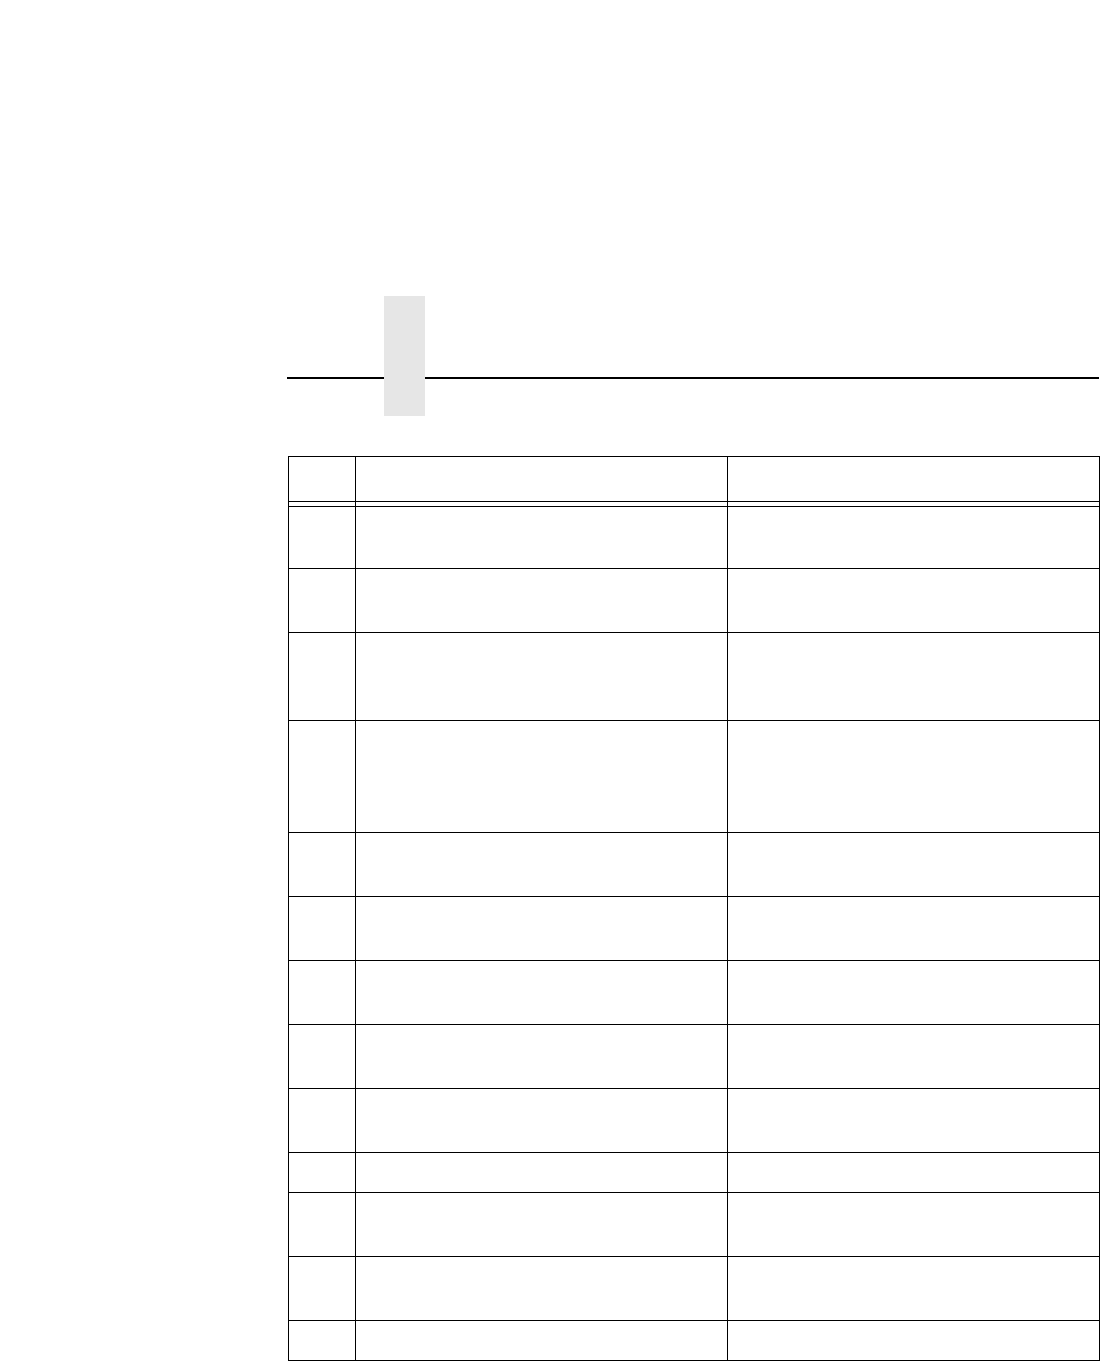
11. Select PRINT SERVER
CONFIGURATION.
This menu displays.
12. Select PRINTER CONFIGURATION. A list of configured printers is
displayed.
13. Select the first item listed as NOT
INSTALLED and press <Enter>.
The PRINTER
N
CONFIGURATION
window comes up where
N
equals the
selected printer.
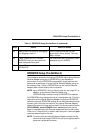
14. Type in the name of one of the eight
default destinations on the unit for the
Name field (e.g. d1prn, d2prn, etc.) and
go to the Type field.
Cursor sits at the Type field with a
printer name now assigned.
15. Press <Enter> at this field and then
select DEFINED ELSEWHERE.
Comes back to the PRINTER
N
CONFIGURATION window.
16. Press <Escape> and select Yes to
save changes.
Gives you the option to define more
printers.
17. Press <Escape> again. Returns to PRINT SERVER
CONFIGURATION menu.
18. Select QUEUES SERVICED BY
PRINTER.
A list of defined printers displays.
19. Select one of these printers. A list of queues comes up. It will be
empty the first time you use it.
20. Press <Insert>. Displays a list of available queues.
21. Select the queue created earlier to
service this printer and press <Enter>.
Asks for a priority.
22. Press <Enter> to select the default.
This is fine for most cases.
Comes back to queue list.
23. Press <Escape> back to Main Menu Main Menu displays.
Table 11. PSERVER Setup (Pre-NetWare 4) (continued)
Step Action Result of Action