Installing System Components 91
NOTICE: Do not use force to seat the processor. When the processor is positioned correctly, it engages easily into
the socket.
c
W
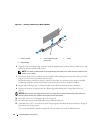
hen the processor is fully seated in the socket, rotate the socket release lever back down until
it snaps into place, securing the processor.
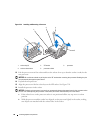
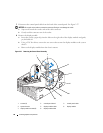
See Figure 3-24.
d
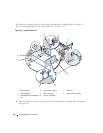
Close the processor cover. See Figure 3-24.
17
Install the heat sink.
a Using a clean lint-free cloth, remove the existing thermal grease from the heat sink.
NOTE: If you did not receive a replacement heat sink, use the heat sink that you removed in step 10.
b
Remove the protective sheet from the thermal grease layer on top of the processor. If you
receive the processor without the thermal grease pre-applied, open the grease packet included
with your processor kit and apply thermal grease evenly to the top of the processor.
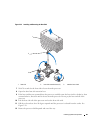
c Place the heat sink onto the processor. See
Figure 3-23
.
d Close one of the two heat sink retention levers until it locks. See
Figure 3-23
.
e Repeat for the other heat sink retention lever.
18 Reinstall the center fan bracket. See
"Replacing the Center Fan Bracket" on page 79.
19
Reinstall the fans in the center fan bracket. See "Removing and Installing a Fan" on page 53.
20
C
lose the system. See
"Closing the System" on page 48.
21
Reconnect the system to the electrical outlet and turn on the system and attached peripherals.
A
s the system boots, it detects the presence of the new processor and automatically changes the
system configuration information in the System Setup program.
22 Press <F2>
to enter the System Setup program, and check
that the processor information matches the
new system configuration
. S
ee
"Using the System Setup Program" on page 33
for instructions about
using the System Setup program.
23 Run the system diagnostics to verify that the new processor operates correctly
. S
ee
"Running the
System Diagnostics" on page 121
for information about running the diagnostics and troubleshooting
processor problems.


