


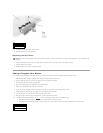
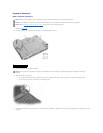

Keyboard Assembly
Removing the Keyboard
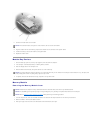
1. Remove the hard drive.
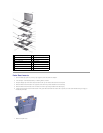
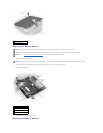
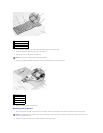
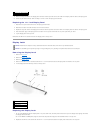
2. Turn the computer over, and remove the five M2.5 x 12-mm screws labeled "circle K."
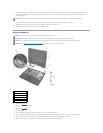
3. Turn the computer over and open the display.
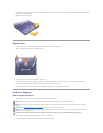
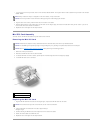
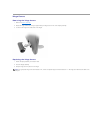
4. Remove the center control cover:
a. Use a small, flat-blade screwdriver or plastic scribe to lift the right edge of the center control cover and pry it loose from the bottom case.
b. Lift the center control cover up and away from the bottom case.
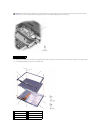
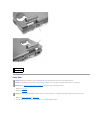
5. To release the keyboard from the palm rest, use a small, flat-blade screwdriver or plastic scribe to pull up on the scalloped edge of the blank key on the
keyboard.
NOTICE: Disconnect the computer and any attached devices from electrical outlets, and remove any installed batteries.
NOTICE: To avoid ESD, ground yourself by using a wrist grounding strap or by touching an unpainted metal surface on the computer.
NOTICE: Read "Preparing to Work Inside the Computer" before performing the following procedure.
1
M2.5 x 12-mm screws (5)
NOTICE: The key caps on the keyboard are fragile, easily dislodged, and time-consuming to replace. Be careful when removing and handling the
keyboard.