


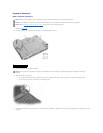
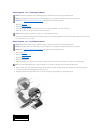
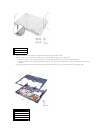
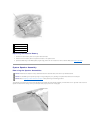

5. Remove the two M2 x 3-mm screws that are located in the hard-drive bay door labeled "circle P."
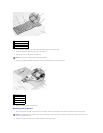
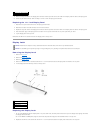
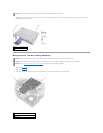
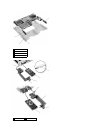
6. Turn the computer over, and remove the three M2 x 3-mm screws that secure the palm rest to the bottom case:
a. Remove the two M2 x 3-mm screws that are located on the back edge of the bottom case, underneath the display assembly.
b. Remove the M2 x 3-mm screw located underneath the keyboard, on the right side of the bottom case, next to the microprocessor thermal cooling
assembly.
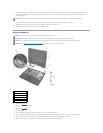
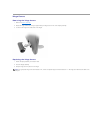
7. Pull up on the pull-tab that is attached to the palm-rest flex cable connector to remove it from the interface connector on the system board.
1
M2.5 x 12-mm screws (3)
2
M2 x 3-mm screws (2)
3
hard-drive bay door
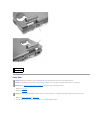
1
M2 x 3-mm screws (3)
2
palm rest
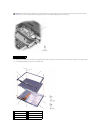
3
palm-rest flex cable
4
bottom case
5
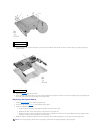
back center of the palm rest
6
touch pad connector