


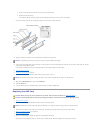

then inserting and tightening all four screws (two screws on each rail).
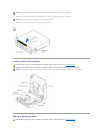
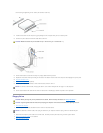
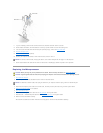
12. Install the hard drive into the computer by gently sliding the drive into place until you hear it securely click.
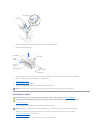
13. Connect the power cable and hard-drive data cable to the drive.
14. Check all connectors to be certain that they are properly cabled and firmly seated.
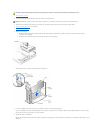
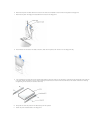
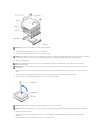
15. Replace the hard drive shroud by inserting the two tabs on the bottom into the holes in the computer and snapping the top into place.
16. Close the computer cover.
17. Attach the computer stand (optional).
18. Connect your computer and devices to their electrical outlets, and turn them on.
19. See the documentation that came with the drive for instructions on installing any software required for drive operation.
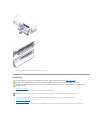
Floppy Drive
1. Shut down the computer.
2. Turn off any attached devices and disconnect them from their electrical outlets.
3. Disconnect the computer power cable from the wall outlet, and then press the power button to ground the system board.
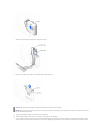
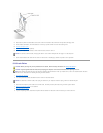
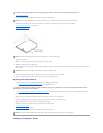
4. Remove the computer stand, if it is attached.
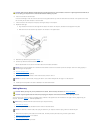
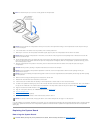
5. Open the computer cover.
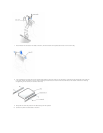
CAUTION: Match the colored strip on the cable with pin 1 on the drive (pin 1 is marked as "1").
NOTICE: To connect a network cable, first plug the cable in to the network wall jack and then plug it in to the computer.
CAUTION: Before you begin any of the procedures in this section, follow the safety instructions in "Safety Instructions."
CAUTION: To guard against electrical shock, always unplug your computer from the electrical outlet before opening the cover.
NOTICE: To disconnect a network cable, first unplug the cable from your computer and then unplug it from the network wall jack.