


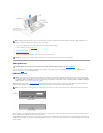

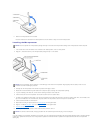


3. Disconnect the power cable from your computer, and then press the power button to ground the system board.
4. Open the computer cover.
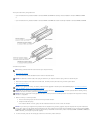
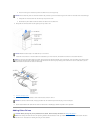
5. Disconnect the cooling fan power cable from the FAN2 connector on the system board.
6. Disconnect the +12-VDC P2 DC power cable from the J5C1 connector on the system board.
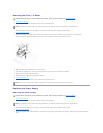
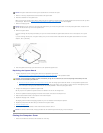
7. Lift up the airflow shroud.
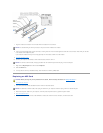
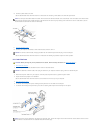
8. For each of the metal securing clips that secure the heat sink to the microprocessor, press down on the clip's latch to release the clip from the retention
base. Then lift each clip out of the tabs on the retention base and away from the heat sink.
9. Lift the heat sink away from the microprocessor.
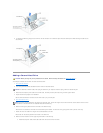
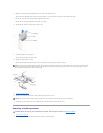
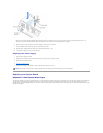
10. Pull the socket lever up straight up until the microprocessor is released.
The microprocessor uses a ZIF socket with a lever-type handle that secures or releases the microprocessor.
NOTICE: To disconnect a network cable, first unplug the cable from your computer and then unplug it from the network wall jack.
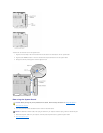
NOTICE: Gently rock the heat sink and then lift it to remove it.
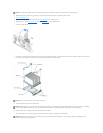
NOTICE: Do not discard the original heat sink and securing clips unless you are installing a microprocessor upgrade kit from Dell. If you are not installing
a microprocessor upgrade kit from Dell, reuse the original heat sink, blower, and securing clips when installing your new microprocessor.
NOTICE: Be careful not to bend any of the pins when you remove the microprocessor package from the ZIF socket. Bending the package pins can
permanently damage the microprocessor.