


5. Remove or move any components that restrict access to the system board.
6. Disconnect all cables from the system board.
Before you remove the existing system board, visually compare the replacement system board to the existing system board to make sure that you have
the correct part. Note that the one-piece system board and the two-piece, riser system board are interchangeable.
7. Remove the shipping screw.
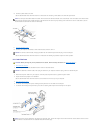
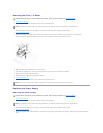
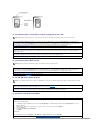
8. Remove the system board.
If you are removing the one-piece system board, pull up on the front tab and slide the system board toward the front of the computer; lift it up and
away.
If you are removing the two-piece, riser system board, pull up on the front tab and the side tab and slide the system board toward the front of the
computer; lift it up and away.
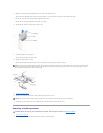
9. Place the system board that you just removed next to the replacement system board.
Replacing the System Board
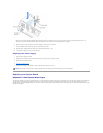
1. Transfer components from the existing system board to the replacement system board.
a. Remove the memory modules (and continuity modules, if any) and install them on the replacement board.
b. Remove the heat sink assembly and microprocessor package from the existing system board and transfer it to the replacement system board.
c. If the system board that you are replacing is a two-piece, riser-type system board, you do not have to remove the riser. Dell supplied you with
either a two-piece, riser-type system board with the riser already attached or with a one-piece system board.
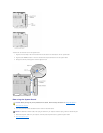
2. Configure the settings of the replacement system board.
Set the jumper on the replacement system board so it is identical to the one on the existing board.
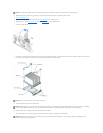
3. Orient the replacement board by aligning the notches on the bottom to the tabs on the computer floor.
4. Slide the board toward the back of the computer until it clicks into place.
5. Replace the shipping screw, if needed.
The shipping screw is included for shipping purposes only—it is not needed for normal computer operation.
6. Replace any components and cables that you removed from the system board.
7. Close the computer cover.
8. Connect your computer and devices to their electrical outlets, and turn them on.
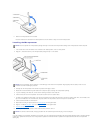
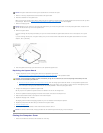
Closing the Computer Cover
1. Ensure that all cables are connected, and fold cables out of the way.
NOTICE: The system board and the metal tray are attached and are removed as one piece.
NOTICE: Release the front tab on the one-piece system board before you remove the system board. For the two-piece system board, release the front
tab and the side tab before you remove the system board.
CAUTION: The microprocessor package and heat sink assembly can get hot. To avoid burns, be sure that the package and assembly have had
sufficient time to cool before you touch them.
NOTICE: To connect a network cable, first plug the cable into the network wall jack and then plug it into the computer.