


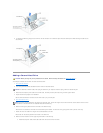

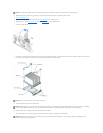
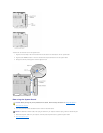


Note the routing of the DC power cables underneath the tabs in the computer frame as you remove them from the system board and drives. It is
important to route these cables properly when you replace them to prevent them from being pinched or crimped.
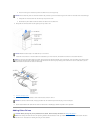
6. Remove the two screws that secure the power supply to the back of the computer.
7. Press the "PUSH" button located on the floor of the computer frame.
8. Slide the power supply toward the front of the system approximately 1 inch.
9. Lift the power supply up and out of the computer.
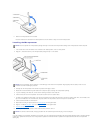
Replacing the Power Supply
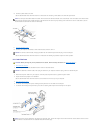
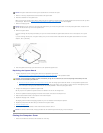
1. Slide the power supply into place.
2. Replace the two screws that secure the power supply to the back of the computer frame.
3. Reconnect the DC power cables.
4. Close the computer cover.
5. Connect your computer and devices to their electrical outlets, and turn them on.
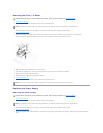
Replacing the System Board
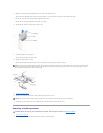
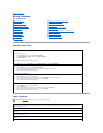
Dimension™8200SystemBoardTypes
This computer supports two types of system boards—a one-piece system board and a two-piece, riser system board. The one-piece system board contains all
four PCI slots. The two-piece, riser system board uses a riser extension that contains card slots PCI3 and PCI4. The riser extension attaches to the riser
system board at the brown RISER connector on the riser extension. Both types of system boards perform identically and are removed and reinstalled the same
way into the computer.
NOTICE: To connect a network cable, first plug the cable into the network wall jack and then plug it into the computer.