


52 Installing System Components
Optical and Tape Drives (Optional)
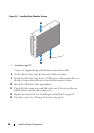
Your system contains two 5.25-inch drive bays. In the upper 5.25-inch drive
bay, you can install only an optical drive. In the lower 5.25-inch drive bay, you
can install either an optical or a tape backup unit.
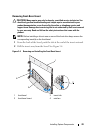
Removing an Optical or Tape Drive
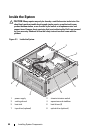
CAUTION: Many repairs may only be done by a certified service technician. You
should only perform troubleshooting and simple repairs as authorized in your
product documentation, or as directed by the online or telephone service and
support team. Damage due to servicing that is not authorized by Dell is not covered
by your warranty. Read and follow the safety instructions that came with the
product.
1
Turn off the system and attached peripherals, and disconnect the system
from the electrical outlet.
2
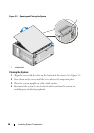
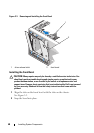
Open the system. See "Opening the System" on page 45.
3
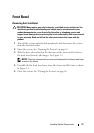
Remove the front bezel. See "Removing the Front Bezel" on page 47.
4
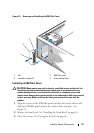
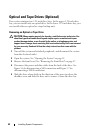
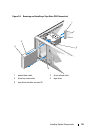
Disconnect the power and data cables from the back of the drive. See
Figure 3-6 for disconnecting a SAS connection and Figure 3-7 for
disconnecting a SATA connection.
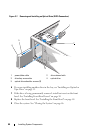
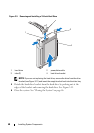
5
Slide the drive release latch in the direction of the arrow to release the
shoulder screw and slide the drive out to remove it from the drive bay.