


DFL-500 User Manual
1
9
Transparent mode installation
This chapter describes how to install your DFL-500 NPG in Transparent mode. If you want to install the DFL-
500 NPG in NAT/Route mode, see NAT/Route mode installation
.
This chapter includes:
•
Preparing to configure Transparent mode
•
Using the setup wizard
•
Using the command line interface
• Setting the date and time
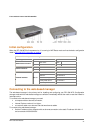
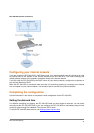
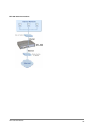
• Connecting to your network
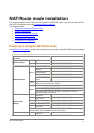
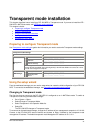
Preparing to configure Transparent mode
Use Transparent mode settings to gather the information you need to customize Transparent mode settings.
Transparent mode settings
Administrator Password:
IP:
_____._____._____._____
Netmask:
_____._____._____._____
Default Gateway:
_____._____._____._____
Management
IP:
The management IP address and netmask must be valid for the network from which you will
manage the DFL-500 NPG. Add a default gateway if the DFL-500 NPG must connect to a router
to reach the management computer.
Primary DNS Server:
_____._____._____._____
DNS Settings:
Secondary DNS
Server:
_____._____._____._____
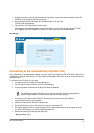
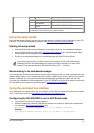
Using the setup wizard
From the web-based manager you can use the setup wizard to create the initial configuration of your DFL-500
NPG. To connect to the web-based manager, see Connecting to the web-based manager
.
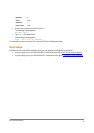
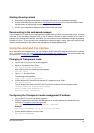
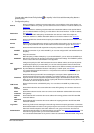
Changing to Transparent mode
The first time that you connect to the DFL-500 NPG it is configured to run in NAT/Route mode. To switch to
Transparent mode using the web-based manager:
•
Go to System > Status .
•
Select Change to Transparent Mode.
•
Select Transparent in the Operation Mode list.
•
Select OK.
The DFL-500 NPG changes to Transparent mode.
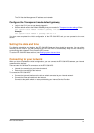
To reconnect to the web-based manager, change the IP address of your management computer to 10.10.10.2.
Connect to the DFL-500 NPG internal interface and browse to https:// followed by the transparent mode
management IP address. The default transparent mode Management IP address is 10.10.10.1.