


DFL-500 User Manual
81
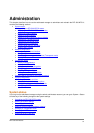
Administration
This chapter describes how to use the web-based manager to administer and maintain the DFL-500 NPG. It
contains the following sections:
•
System status
•
Upgrading the DFL-500 NPG firmware
•
Displaying the DFL-500 NPG serial number
• Backing up system settings
• Restoring system settings
• Restoring system settings to factory defaults
• Changing to Transparent mode
• Changing to NAT/Route mode
• Restarting the DFL-500 NPG
• Shutting down the DFL-500 NPG
• System status monitor
• Network configuration
• Configuring the internal interface
• Configuring the external interface
• Configuring the management interface (Transparent mode)
• Setting DNS server addresses
• Configuring routing
• Adding routing gateways
• Adding a default route
• Adding routes to the routing table
• Configuring the routing table
• Enabling RIP server support
• Adding routes (Transparent mode)
• Providing DHCP services to your internal network
• System configuration
• Setting system date and time
• Changing web-based manager options
• Adding and editing administrator accounts
• Configuring SNMP
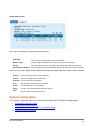
System status
If you log into the web-based manager using the admin administrator account, you can go to System > Status
to make any of the following changes to the system settings.
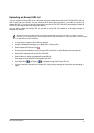
• Upgrading the DFL-500 NPG firmware
• Backing up system settings
•
Restoring system settings
•
Restoring system settings to factory defaults
•
Changing to Transparent mode
•
Changing to NAT/Route mode
•
Restarting the DFL-500 NPG