


28
Setting up your wireless router
Using Wi-Fi Protected Setup
WPS uses WPA2 for encryption. It does not provide additional security, but rather,
standardizes the method for securing your wireless network. You can use either the Push
Button Configuration (PBC) method or Personal Identification Number (PIN) method to let a
device access your wireless network.
PBC—Push and hold the WPS button located on the back of your router for three seconds.
Then, initiate the WPS procedure on the client device within two minutes. Refer to your
client's documentation on this procedure. Pushing the PBC button will automatically enable
WPS. The client has now been securely added to your wireless network.
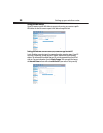
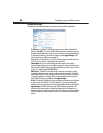
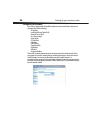
PIN—The client device has a PIN number (either four or eight digits) that is associated with
WPS. Enable WPS through the screen illustrated below. Enter the client's PIN into your
router's internal registrar (accessed through this screen). The client will be automatically
enrolled into your wireless network within two minutes.
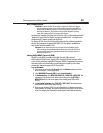
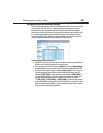
Wi-Fi Protected Setup (WPS)—Enabled or Disabled.
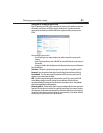
Personal Identification Number (PIN) Method—In this method, a wireless client
wanting to access your network must supply a 4- or 8-digit PIN to your router. After clicking
Enroll, you must start the WPS handshaking procedure from the client within two minutes.
Router PIN—If an external registrar is available, you can enter in your router’s PIN to the
registrar. Click Generate New PIN to change the PIN from the default value. Click Restore
Default PIN to reset the PIN value.
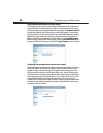
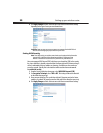
Push Button Configuration (PBC) Method—PBC is an alternate method to connect to a
WPS network. Push the PBC button located on the back of your router for three seconds,
then initiate the PBC on the client device. Alternatively, push the Start PBC soft button to
start this process.
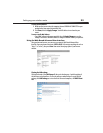
Manual Configuration Method—This section lists the default security settings to be set
up if not using WPS.