EPSON LQ-2080
14 -
EPSON LQ-2080
2/99
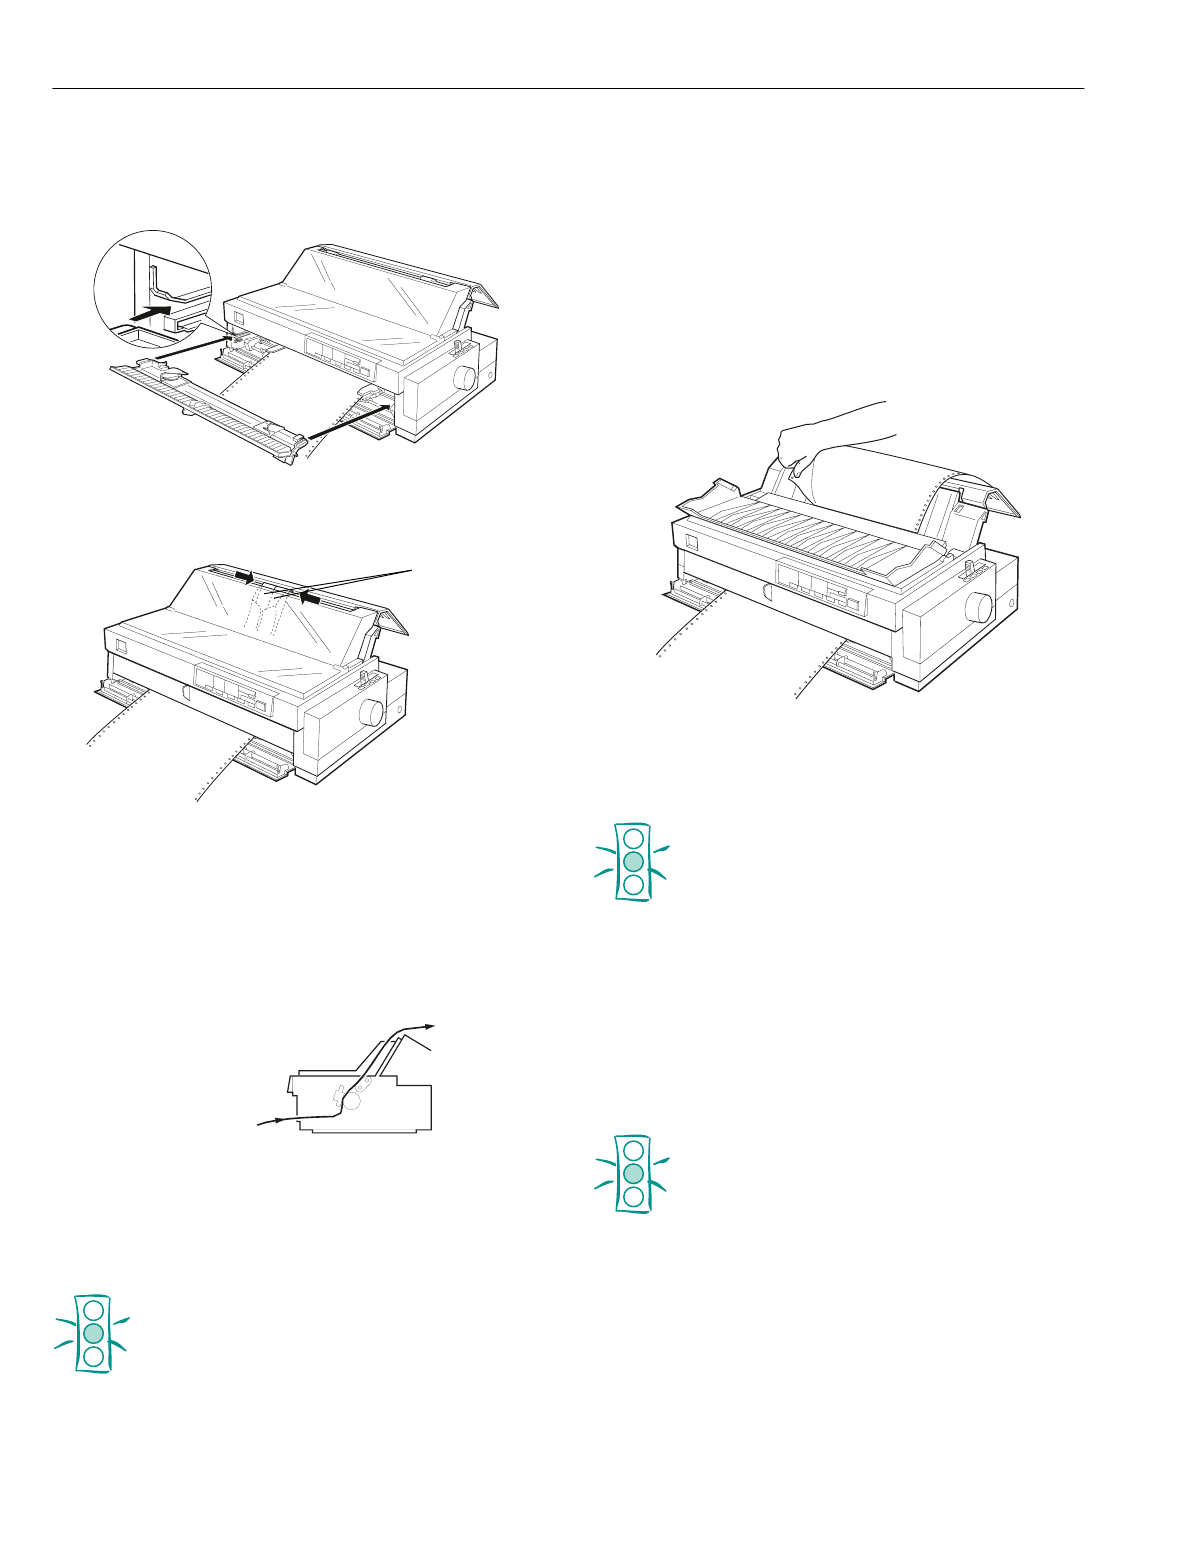
8. Attach the front paper guide by sliding it along the
mounting slots as shown below, and close the front
paper guide.
9. Slide the edge guides to the middle of the top paper guide.
Make sure the printer and paper guide covers are closed.
Note:
Always close the printer cover before printing. The printer does
not print when the cover is open.
10. Turn on the printer. You may need to check and change the
printer driver settings. When the printer receives data, it
automatically loads the paper and starts printing. The
printed pages are fed over the paper guide toward the back
of the printer.
After you finish printing, follow the steps in the next section to
tear off your printed document. If the first printed line on your
page appears too high or low, you can fix this using the micro
adjust feature as described in “Adjusting the Top-of-Form
Position” on page 22.
Caution:
Never use the knob to adjust the top-of-form position
while the printer is turned on; this may damage the
printer or cause it to lose the top-of-form position.
The knob can be used when the printer is turned
off only.
Removing the printed document from the front
push tractor
To remove the printed document, follow these steps:
1. Make sure the
Tear/Off Bin
lights are flashing. (This
indicates that your paper is at the current tear-off position.)
You may need to press the
Tear Off/Bin
button to advance
the paper to the tear-off position.
2. Open the paper guide cover, and tear off the printed
document using the tear-off edge of the printer.
Note:
If the paper perforation is not properly aligned with the tear-off
edge, you can adjust the tear-off position using the micro adjust
feature. See “Adjusting the tear-off position” on page 23.
Caution:
Never use the knob to adjust the tear-off position while
the printer is turned on; this may damage the printer or
cause it to lose the tear-off position. The knob can be
used when the printer is turned off only.
3. Close the paper guide cover.
When you resume printing, the printer automatically feeds the
paper back to the top-of-form position and starts printing.
To remove the remaining paper from the printer, press the
Load/Eject
button to feed the paper backward to the standby
position. Then open the sprocket covers of the tractor and
remove the paper.
Caution:
Always tear off your printed document before you press
the
Load/Eject
button. Reverse feeding several pages
at a time may cause a paper jam.
edge
guides
