Vigor3300 Series User’s Guide
8
1
1
.
.
2
2
H
H
a
a
r
r
d
d
w
w
a
a
r
r
e
e
I
I
n
n
s
s
t
t
a
a
l
l
l
l
a
a
t
t
i
i
o
o
n
n
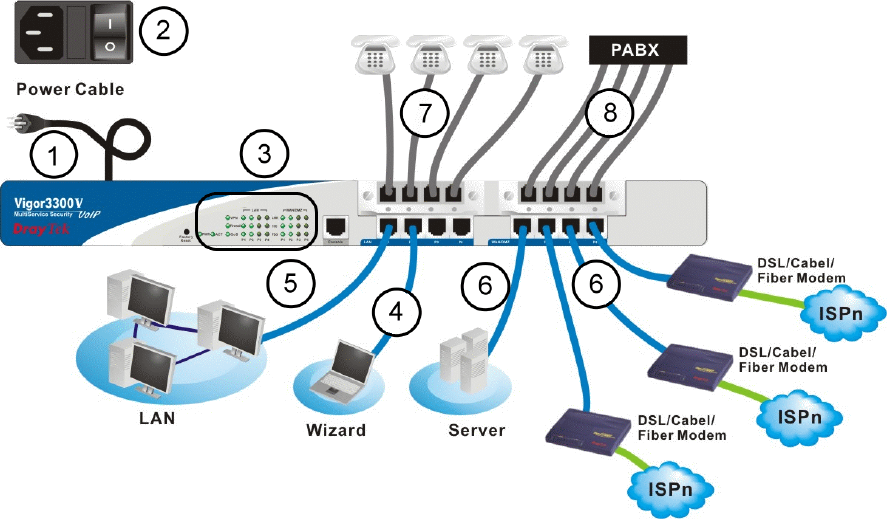
Before starting to configure the router, you have to connect your devices correctly.
1. Connect the power cord to the power port of Vigor3300 router on the rear panel, and the
other side into a wall outlet.
2. Power on the device by pressing the power switch on the rear panel. The PWR LED
should be ON.
3. The system starts to initiate. After completing the system test, the ACT LED will light
up and start blinking.
4. Connect one end of an Ethernet cable (RJ-45) to one of the LAN ports of Vigor3300.
5. Connect the other end of the cable (RJ-45) to the Ethernet port on your computer (that
device also can connect to other computers to form a small area network). The LAN
LED for that port on the front panel will light up.
6. Connect a server/modem/router (depends on your requirement) to any available WAN
port of the device with Ethernet cable (RJ-45). The WAN LED will light up.
7. Connect telephone sets to the FXS ports of Vigor3300V with telephone lines (RJ-11 to
RJ-11). For the users of Vigor3300 and Vigor3300B+, please skip this step.
8. Connect the FXO ports to PABX with telephone lines (RJ-11 to RJ-11). For the users of
Vigor3300 and Vigor3300B+, please skip this step.
Below shows an outline of the hardware installation for your reference (take Vigor3300V as
an example).


