


EPSON Stylus PHOTO 810/820/830 Revision B
Disassembly and Assembly Disassembly 104
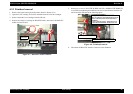
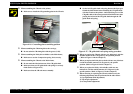
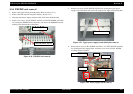
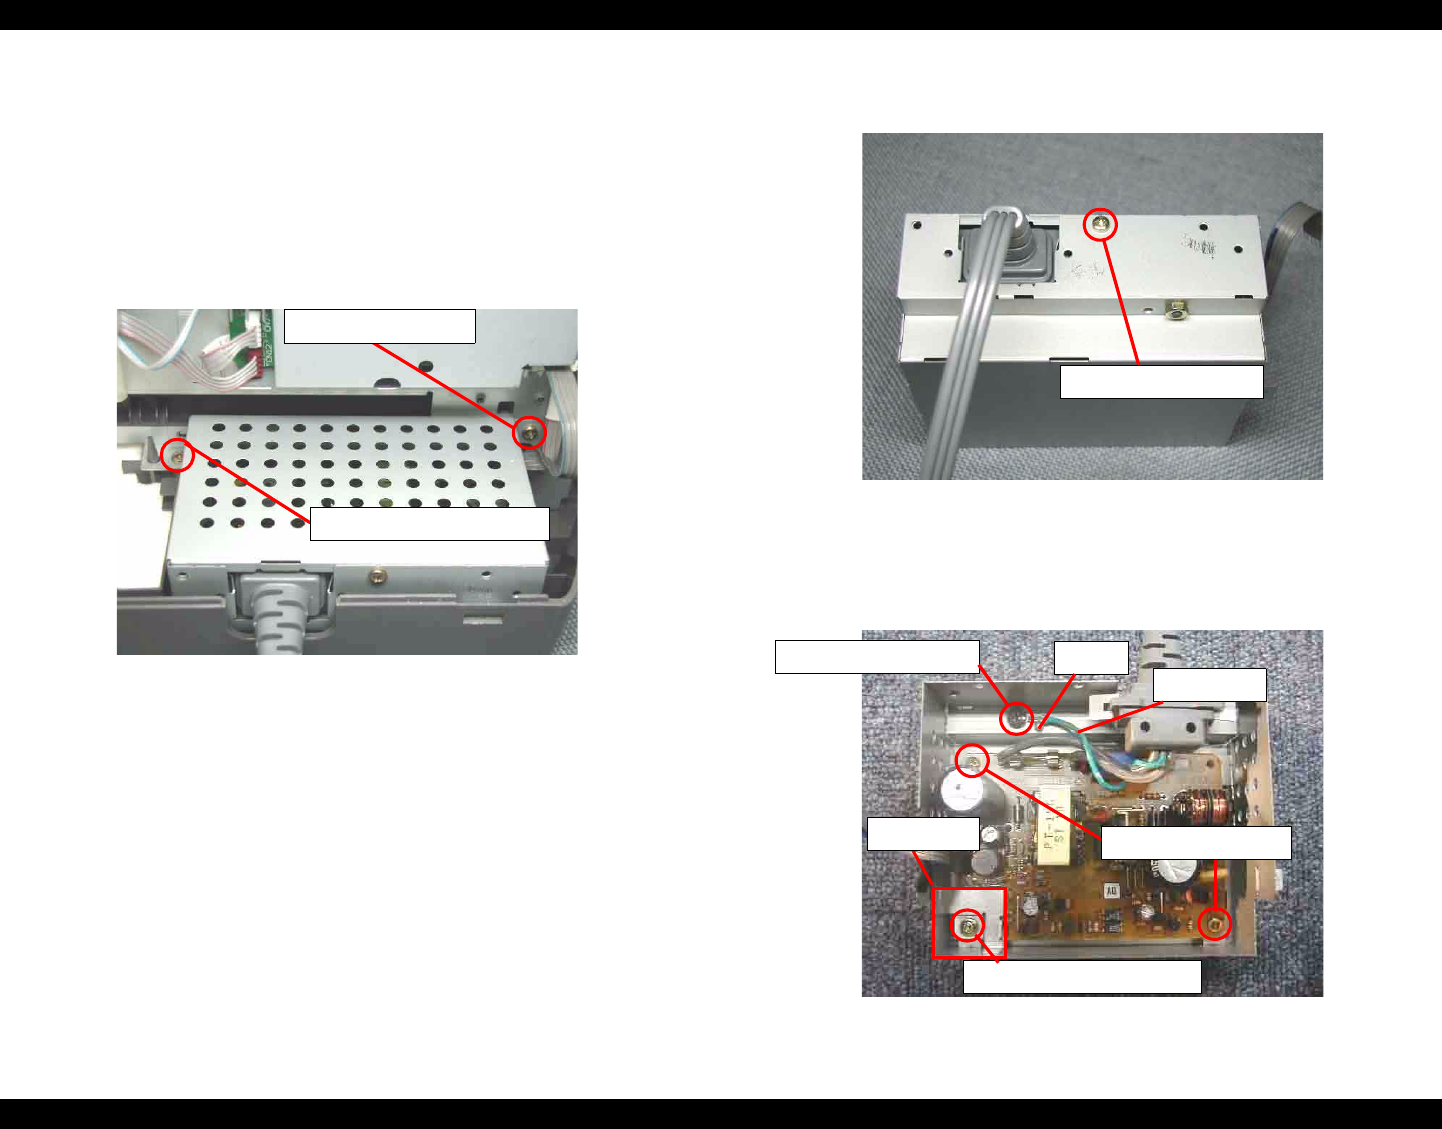
4.3.6 PSB/PSE unit removal
1. Remove the Upper housing from the printer (Refer to Section 4.3.1).
2. Remove the ASF unit from the printer (Refer to Section 4.3.5)
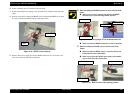
3. Disconnect the Power supply connector cable (CN2) from the Main board.
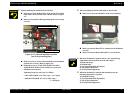
4. Remove two screws (C.B.S. SCREW 3x6 F/Zn, C.B.P-TITE SCREW 3x8 F/Zn)
for securing the PSB/PSE unit to the printer, and remove the PSB/PSE unit with
pulling toward the backside of the printer.
Figure 4-24. PSB/PSE unit removal
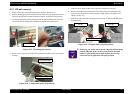
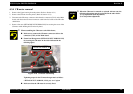
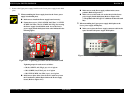
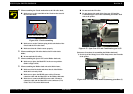
5. Remove one screw (C.B.S. SCREW 3x6 F/Zn) for securing the Upper power
supply board shield plate, and remove the Upper power supply board shield plate.
Figure 4-25. Upper power supply board shield plate removal
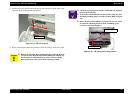
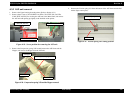
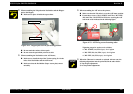
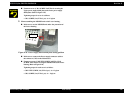
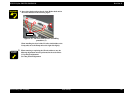
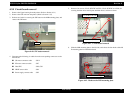
6. Remove three screws (C.B.S. SCREW 3x6 F/Zn, C.C.S-TITE SCREW 3x6 F/Zn)
for securing the Power supply board, and remove one screw (C.B.(O). SCREW
4x5 F/Zg) for the earth wire.
Figure 4-26. Power supply board removal
C.B.S. SCREW, 3x6, F/Zn
C.B.P-TITE SCREW, 3x8, F/Zn
C.B.S. SCREW, 3x6, F/Zn
C.B.S. SCREW, 3x6, F/Zn
Earth wire
Dowel
C.B.(O). SCREW, 4x5, F/Zg
C.C.S-TITE SCREW, 3x6, F/Zn
Radiator, P/S