


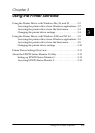

Using the Printer
2-37
2
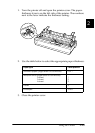
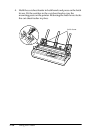
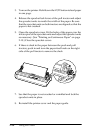
13. Slide the left edge guide to the center until it stops at the guide
mark. Then slide the right edge guide to fit the size of paper
you will use.
Note:
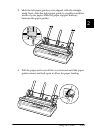
❏
To remove the paper guide from the cut-sheet feeder, press both
release tabs and pull out the paper guide.
❏
Make sure the paper guide cover is open when you print.
You can easily switch between continuous paper and cut-sheet
feeder operation. See “Switching back to single sheets” on page
2-16 for details.
Note:
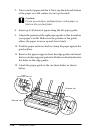
When you print several pages of continuous paper, fold the first printed
page forward at the perforation after the perforation emerges from below
the printer cover. This helps the printer feed the printed pages properly
and prevents paper jams.
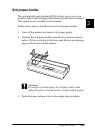
Pull tractor unit
An additional pull tractor (C80034
✽
) is available as an option.
You can improve the performance of continuous paper handling
by using two tractors at the same time. This is especially useful
with continuous pre-printed forms and multipart forms.
Follow these steps to install and load paper on a standard and an
additional pull tractor:
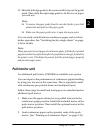
1. Make sure the paper-release lever is pulled forward to the
continuous-paper position. Install the included tractor in the
push-tractor position. Then install the optional tractor in the
pull-tractor position.
2. Load continuous paper on the sprocket units of the push-
tractor. (See “Printing on Continuous Paper” on page 2-10.)