MLC 104 IP Plus • Software Setup
Software Setup, cont’d
3-6
MLC 104 IP Plus • Software Setup
3-7
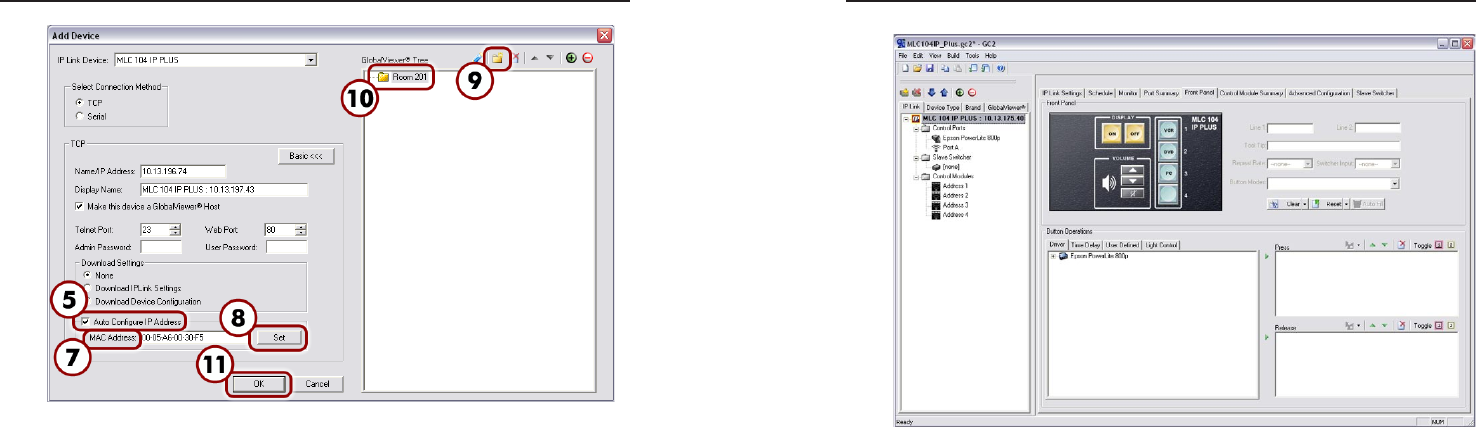
Add Device dialog box (Advanced)
5. Select the Auto Configure IP Address check box. The
MAC Address text box becomes active and the first three
octets of the MAC address appear.
6. Locate the MAC address on the rear of the Extron IP
product or obtain it from your network administrator.
7. Enter the remainder of the MAC address in the MAC
Address text box (the first three octets should be filled in).
8. Click the Set button. This assigns the new IP address to
the IP device.
9. Click the New Location button in the upper right corner of
the Add Device dialog box. A Location folder is created,
in edit mode. You can use additional folders to create up
to eight location levels.
10. Assign a location-oriented name to the highlighted folder
(e.g., Room 201).
11. Once finished, click the OK button. The
Global Configurator Front Panel window appears, as
shown on the following page.
The Global Configurator Front Panel window
N
This Global Configurator project can be saved at any time
by selecting Save from the File menu.
Step 4: Define E-mail Settings
Global Configurator supports scheduling, monitoring, and
e-mail alerts for all connected devices (e.g., a video projector).
For example, you can create a schedule to shut down a projector
at a predetermined time, and/or create an e-mail alert that
warns a school administrator if the projector's lamp hours are
nearing expiration.
Defining e-mail server settings
Before you set up e-mail notifications, ensure that your e-mail
server, subnet mask and gateway settings are set. If not, use the
Change Device Setting feature to set them up.
1. From the Tools menu, choose Change Device Settings....
The Device Settings page appears and displays every
device in the current project.
2. Select the MLC 104 IP Plus from the list.
3. From the Settings menu, choose Set Mail Server....


