MLC 104 IP Plus • Software Setup
Software Setup, cont’d
3-10
MLC 104 IP Plus • Software Setup
3-11
Step 5: Add a Serial and an IR Device
Adding an A/V device (projector displays, VCRs, DVDs, etc.)
for an MLC to control requires that you first add the device’s
driver to the GC configuration.
Downloading additional drivers
If you successfully downloaded device drivers in
"Step 1: Download Device Drivers", proceed to "Adding a serial
driver" on the following page.
If you have not downloaded or need additional device drivers
for your open project, you'll need to save and close the current
project to access new drivers. To do so,
1. Select New from the File menu, but click the Yes button
when prompted to save.
2. If the file was not previous saved, you must enter a project
name in the Project Name field.
3. Click the OK button. This automatically closes the current
project.
4. Click the Add Drivers Subscription button on the start
options dialog.
5. Follow the instructions under "Step 1: Download Device
Drivers".
6. Reopen the saved project by choosing Open An Existing
Project from the list of options.
You are now ready to add A/V devices to the configuration
using the new drivers.
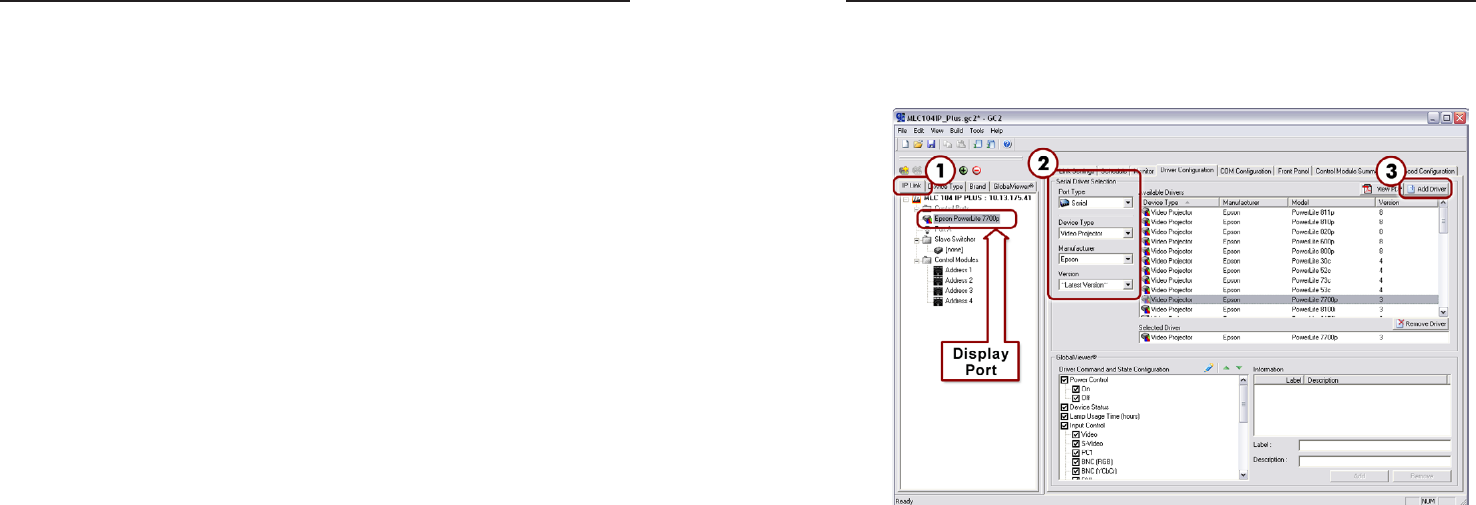
Adding a serial driver
1. From the IP Link tab (on the left pane), select the port
named Display.
Add serial driver window
2. Use the drop-down menus under Serial Driver Selection
to select the device type (choose video projector), and
manufacturer (choose Epson). For this example, select the
Epson PowerLite 7700p video projector from the Available
Drivers field.
3. Click the Add Driver button. The Epson projector appears
within the Selected Driver field.
Notice that this action also populates the Driver
Command and State Configuration field with predefined
functions. These functions later appear as buttons on your
GlobalViewer
®
Web page.
