


Using Multi-Screen Display
27
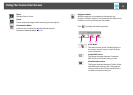
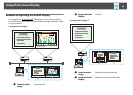
Procedure Before Using the Multi-screen Display
Function
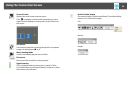
Setting the Virtual Display
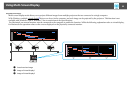
This section explains the virtual display for arrangement example 1.
s p.26
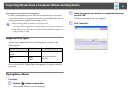
Enable the virtual display driver (Windows only)
Enable the virtual displayg driver. Those users listed below do not have
to perform this operation and should skip to s "Adjusting the Virtual
Display" p.28.
• Those users who have enabled virtual displays installing EasyMP
Network Projection.
• Those users with Macintosh computers.
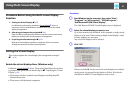
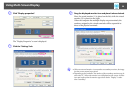
Procedure
A Start Windows on the computer, then select "Start" -
"Programs" (or "All Programs") - "EPSON Projector" -
"Add-Remove EPSON Virtual Display".
The Add-Remove EPSON Virtual Display screen is displayed.
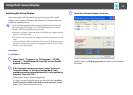
B Select the virtual display you want to use.
Up to four monitors can be added. In this example, a single virtual
display is to be used. When setting multiple virtual displays, select
as many displays as is necessary.
Any one of the displays can be selected.
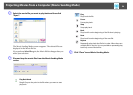
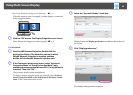
C Click "OK".
When you click OK, the drivers for the virtual display are enabled.
At this point, it is normal for the display to flicker. Wait for the
Add-Remove EPSON Virtual Display screen to close.
1. Setting the Virtual Display s p.27
In a Windows environment, enable the virtual display
g driver as
necessary. And, for both Windows and Macintosh, set up the virtual
display arrangement.
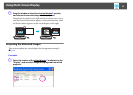
2. Allocating the image to be projected s p.31
Open the file to be projected, and then move the screen to the virtual
display according to the actual projection arrangement.
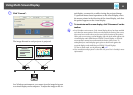
3. Projecting the allocated images s p.32
Allocate a virtual display number to a projector that is connected
through the network, and then start projection.