


Copying a Photo or Document 11
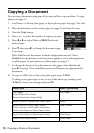
9. When you’re ready to copy, press x
Start. If you need to cancel copying, press
y
Stop/Clear Settings.
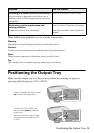
Note:
Do not pull out paper as it is printing; it ejects automatically.
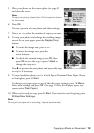
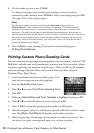
Copying a Photo
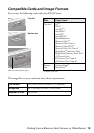
You can make copies of your photos on 4 × 6-inch, 5 × 7-inch, 8 × 10-inch,
letter-size, or A4-size photo paper using a variety of layouts. To copy photos on
plain paper, see page 10.
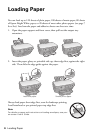
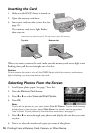
1. Load Epson photo paper. See page 7 for a list.
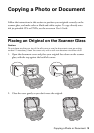
2. Place your photo on the scanner glass (see page 9) and close the cover.
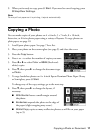
3. Press the
Copy button.
4. Press
+ or – to select the number of copies you want.
5. Press l or r to select
Color or B&W (black-and-
white) copies.
6. Press d, then press r to change the document type
to
Photo.
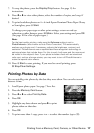
7. To copy borderless photos on 4 × 6-inch Epson Premium Photo Paper Glossy
or Semi-gloss, press x
Start.
To change any of the copy settings, go to the next step.
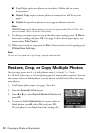
8. Press d, then press r to change the layout, if
necessary.
■ With Border leaves a small margin around
the photo.
■ Borderless expands the photo to the edge of
the paper (slight cropping may occur).
■ Wallet Copy copies as many wallet-size photos as will fit on your paper
(up to 9).