


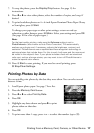
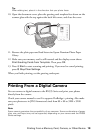

20 Printing From a Memory Card, Camera, or Other Device
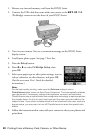
1. Remove any inserted memory card from the RX595 Series.
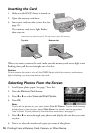
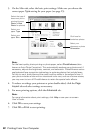
2. Connect the USB cable that came with your camera to the
EXT. I/F USB
(PictBridge) connector on the front of your RX595 Series.
3. Turn on your camera. You see a connection message on the RX595 Series
display screen.
4. Load Epson photo paper. See page 7 for a list.
5. Press the
Setup button.
6. Press l or r to select
PictBridge Setup, then
press
OK.
7. Select your paper type or other print settings, turn on
red eye reduction or other features, and press
OK.
(See the on-screen User’s Guide for detailed
instructions.)
Note:
For the best quality printing, make sure the Enhance setting is set to
PhotoEnhance
(also known as Auto Photo Correction). This automatically analyzes
your photos and, if necessary, adjusts the brightness, contrast, and saturation.
PhotoEnhance uses a sophisticated face recognition technology to optimize photos
that include faces. For this to work, both eyes and the nose must be visible in the
subject’s face. If your photo includes a face with an intentional color cast, such as a
bronze statue, you may want to turn off PhotoEnhance to retain the special color
effects.
8. Follow the instructions that came with your camera to select your photos and
print them.