


Extron • System 4
xi
Switcher Series • User’s Manual
Chapter 2 • Configuration and Installation
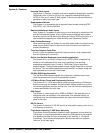
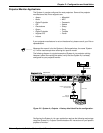
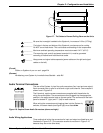
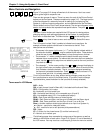
4. Place the System 4xi on a
clean work space and
remove eight (8) screws
shown in Figure 2-4.
5. Lift the cover straight up.
6. Go to the procedure for
which you have opened the
cover (projector
configuration or changing the
fuse).
_____ Do NOT touch any switches
or electronic components,
other than those specified.
This could seriously affect
the operation of the system.
7. Reverse this procedure
when finished working
inside the System 4xi.
(French) Enlever le couvercle du Système 4
xi
- page B-3
(German) Entfernung der System 4
xi
Abdeckung - seite B-5
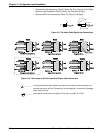
Figure 2-4. Removing the System 4
xi
Cover
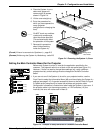
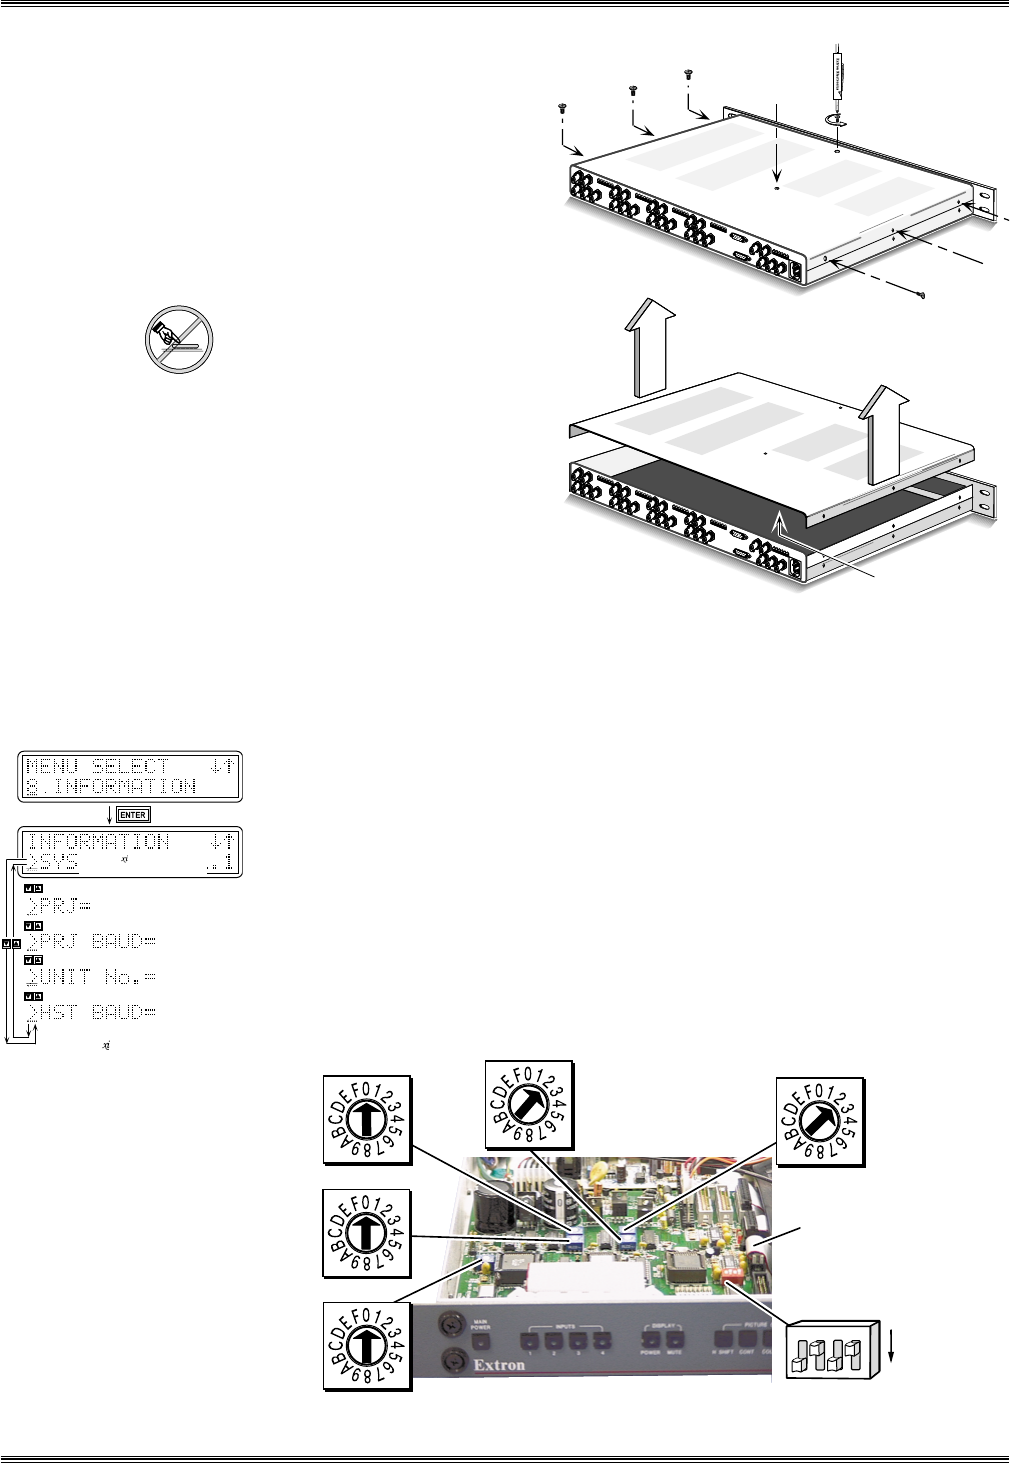
Setting the Main Controller Board for the Projector
Before each System 4xi ships, it is set for the application specified by the
customer. The projector name is on a label on the rear panel (see Figure 2-1).
However, if there is a need to change these settings (e.g. using a different
projector/monitor), switch settings must be changed on the Main Controller
board.
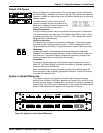
1. If you are not sure if the System 4xi is set for your projector/monitor, use the
Front Panel to select the Information Menu (#8), and then display the System 4xi
settings (see page 3-10). A general example is shown to the left. Refer to Figure
2-5 below as an example only to locate the switches and projector cable.
Configuration information is located on a label inside the System 4xi top cover. If
the projector cable is on the wrong connector, or if DIP switches (1-4) are
incorrect, this error will not be seen in Menu 8.
Figure 2-5. Example of Setup Switches on the Main Controller Board
(Note: Information depends on
S
y
stem 4 setup.
)
(See note.)
(See note.)
(See note.)
(See note.)
[System 4 model and software
version displayed here]
2-4
Configuration
Label Inside
SW1
ON
SW2
SW3
SW6
SW5
J15
3
4
1
2
SW4