


IPL M PDP-ES • Communication and ControlIPL M PDP-ES • Communication and Control
Communication and Control, cont’d
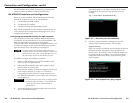
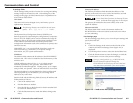
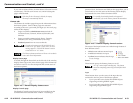
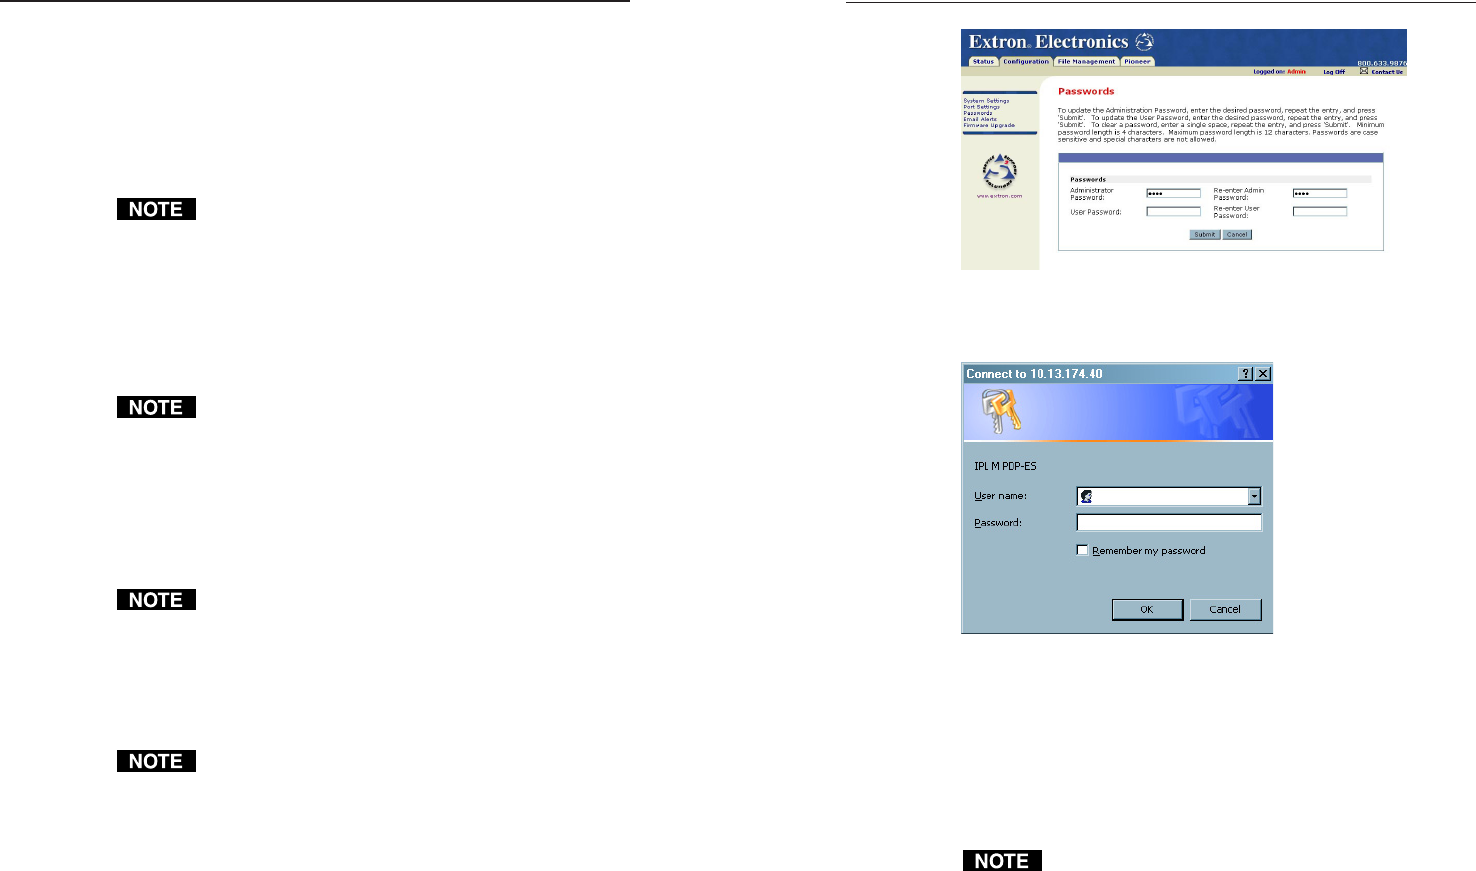
Figure 4-4 — Web server Passwords screen
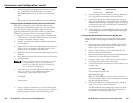
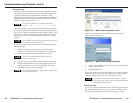
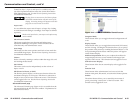
After you press the Submit button, the password window
should appear (figure 4-5).
Figure 4-5 — Web server password window
5. Enter your administrator or user password. A User Name
entry is not required.
6. Click the OK button.
Once passwords have been set, the Web server window appears
whenever a user accesses the unit (figure 4-5). If you click OK
without entering a password, you are a read-only user.
If you want to clear a password protection at a certain
access level, enter a single space in each appropriate field
and click the Submit button.
Email Alerts page
If you have created scheduled events or monitoring tasks on the
IPL M PDP-ES interface card, you can write an email alert with
a message corresponding to that event or task (e.g., a timer
4-7
Passwords page
The fields on the Passwords page are for entering and verifying
passwords. Passwords are case sensitive and are limited to 12
uppercase and lowercase alphanumeric characters. Each
password must be entered twice; once in the Password field and
then again in the Re-enter Password field. Characters in these
fields are masked by asterisks (*****).
The following characters are invalid in passwords:
{space} + ~ @ = ‘ [ ] { } < > ’ “ ; : | \ and ?.
As shown in figure 4-4, password-protected connections allow
two levels of protection: administrator and user. Administrators
have access to status information and all function control. Users
have access to status information and limited function control.
Read-only users have no privileges, and can only view current
settings.
Users without a password when passwords have been set
are referred to as read-only users.
To set passwords for each level of user, do the following on the
Passwords page:
1. Click Passwords on the menu (on the left side of the
window). The Passwords screen (figure 4-4) is displayed.
2. Enter the password(s) for administrator, and user.
If there is no administrator password, your user
password is not saved.
3. Tab over to the second field to reenter the same password.
4. Click the Submit button to enter the changes, or click the
Cancel button to revert to previous settings. If a field is
left blank, no password(s) is assigned.
To clear a password, enter a single space in each field and
click the Submit button.
4-6