


49
Replacing the cooling assembly
www.gateway.com
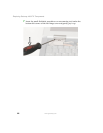
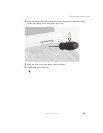
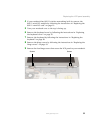
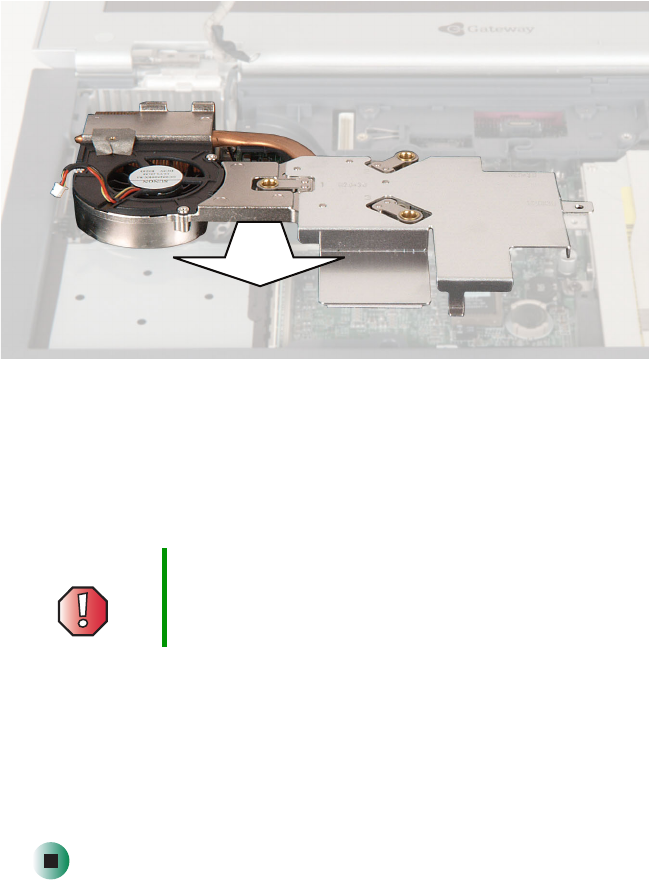
9 At the same time as you lift, move the cooling assembly to the front of
the notebook and remove it.
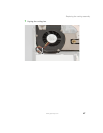
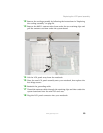
10 Insert the new cooling assembly into your notebook. The screw tabs should
go above the optical drive tab and below the LED indicator panel shielding
tab.
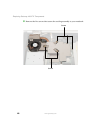
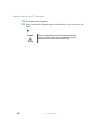
11 Tighten the three screws that are stamped with the numbers 1 through 3
next to them. Make sure that you tighten the screws in numerical order.
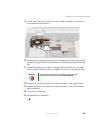
12 Replace the screw that holds the cooling assembly to the optical drive.
13 Replace the screw that holds the cooling assembly to the LED indicator
panel shielding.
14 Plug in the cooling fan.
15 Reassemble your notebook.
Warning When tightening the cooling assembly’s screws into the
numbered holes, tighten them in numerical order.