


26 Replacing and Adding System Components
■ IDE hard drives can be configured as single, master, or slave. IDE CD
drives can be configured as master or slave. Configure the drives by using
the drive-select jumpers located on the drives.
■ If only one drive is attached to a controller cable, configure the drive as
single if it is a hard drive or master if it is a CD drive. If two drives of
any type are attached to the cable, configure one as master and one as
slave.
■ You may need to configure the drives you install using the BIOS Setup
utility program. Press F1 at start up to access the BIOS Setup utility
program.
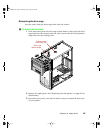
The drive cage
Releasing the drive cage
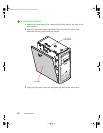
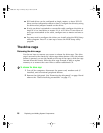
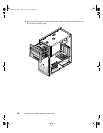
You do not have to remove any screws to release the drive cage. The drive
cage is secured in the chassis by a drive cage release button. Once the release
button is pressed, you use the handle at the top of the cage to slide the cage
forward from the chassis. Slide the drive cage forward to add or replace
memory or to remove the cover filler to add an additional CD.
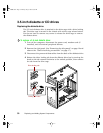
To release the drive cage:
1 Turn off the computer, disconnect the power cord, modem cord (if
installed), and all external peripheral devices.
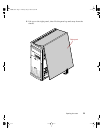
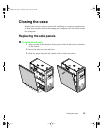
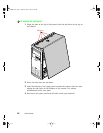
2 Remove the right panel. (See “Removing the side panels” on page 19 and
observe the “Static electricity precautions” on page 17.)
05957.book Page 26 Monday, May 8, 2000 10:09 AM