


Maintaining and troubleshooting42
Replacing the printheads
You do not have to replace all four printheads when one needs to be replaced.
Only replace the color of printhead indicated.
You can check the status of the printheads from the Toolbox. You can also check the
printer control panel to see if a printhead needs to be replaced, as shown here.
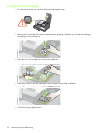
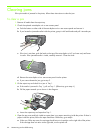
To replace a printhead
1. Turn the printer power on, and then lift the printing supplies cover.
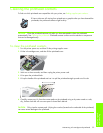
2. Lift to open the printhead latch.
3. Lift up the handle of the printhead and use it to pull the printhead straight up and out of its slot.
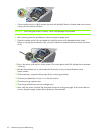
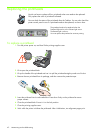
4. Remove the new printhead from its package, and then remove the protective tape.
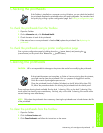
5. Insert the printhead into its color-coded slot. Press down firmly on the printhead to ensure
proper contact.
6. Close the printhead latch. Ensure it is in the lock position.
7. Close the printing supplies cover.
8. Wait while the printer initializes the printheads. After initialization, two alignment pages print.
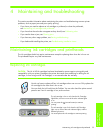
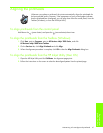
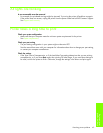
The printhead needs to be replaced when the
Printhead light and a color indicator light are on.
The Resume light is also on.
You must replace the printhead to continue printing.