


Mac OS X
1. From the File menu in your software application, choose Print.
2. Choose Paper Type/Quality from the pop-up menu.
3. In the Color Options area, make sure the Color setting is not set to Grayscale.
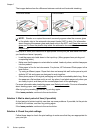
Solution 5: Check estimated ink levels and replace low or empty ink cartridges
Follow these steps to check the estimated ink levels on your product, and then replace
low cartridges according to the results.
For more information about checking ink levels, see
Check the estimated ink levels.
• If the ink-level graphic shows low cartridges, and you are not satisfied with the
quality of your prints, replace the cartridges now. For more information about
replacing cartridges, see
Replace the ink cartridges.
• If the ink-level graphic shows cartridges that are not low, you do not need to
replace the cartridges yet. Continue to the next solution.
Solution 6: Print and evaluate a diagnostic report and troubleshoot defects
1. To help diagnose the print quality problems, follow the instructions for your particular
model to print a diagnostic report.
• If your product does not support wireless communication, see
Print Quality
Diagnostic Report.
• If your product supports wireless communication, see
Self-Test Report.
2. After evaluating the report, if you see no defects on the diagnostic report, the print
mechanism and ink supplies are working correctly. If prints are still unsatisfactory,
check the following:
• Make sure the image file has sufficient resolution. Images that have been
enlarged too much might appear fuzzy or blurry.
• If the problem seems confined to a band near the edge of a print, the problem
might not appear on the other end of the print. Try using a program on your
computer to rotate the document or image 180 degrees.
• If the issue persists, visit the HP online support Web site at
www.hp.com/
support for further troubleshooting information.
NOTE: Stop troubleshooting here. Do not continue with the steps below if the
page shows no defects.
3. If you see one or more defects on the diagnostic report, continue to the next
solution.
Chapter 7
80 Solve a problem