


Advanced Configuration and Management Guide
NOTE: All the ports must be members of the port-based VLAN that contains this IP sub-net VLAN. See
“Layer 3 Protocol-Based VLANs” on page 16-3.
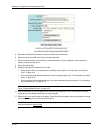
11. Click the Add button (if you are adding a new VLAN) or the Modify button (if you are modifying an existing
VLAN) to save the change to the device’s running-config file.
12. Select the Save
link at the bottom of the dialog. Select Yes when prompted to save the configuration change
to the startup-config file on the device’s flash memory.
NOTE: You also can access the dialog for saving configuration changes by clicking on Command in the tree
view, then clicking on
Save to Flash.
Configuring an IPX Network VLAN
1. Log on to the device using a valid user name and password for read-write access.
2. Click on the plus sign next to Configure in the tree view to expand the list of configuration options.
3. Click on the plus sign next to VLAN in the tree view to expand the list of VLAN option links.
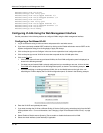
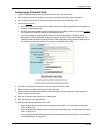
4. Click on the Protocol
link.
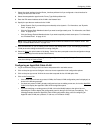
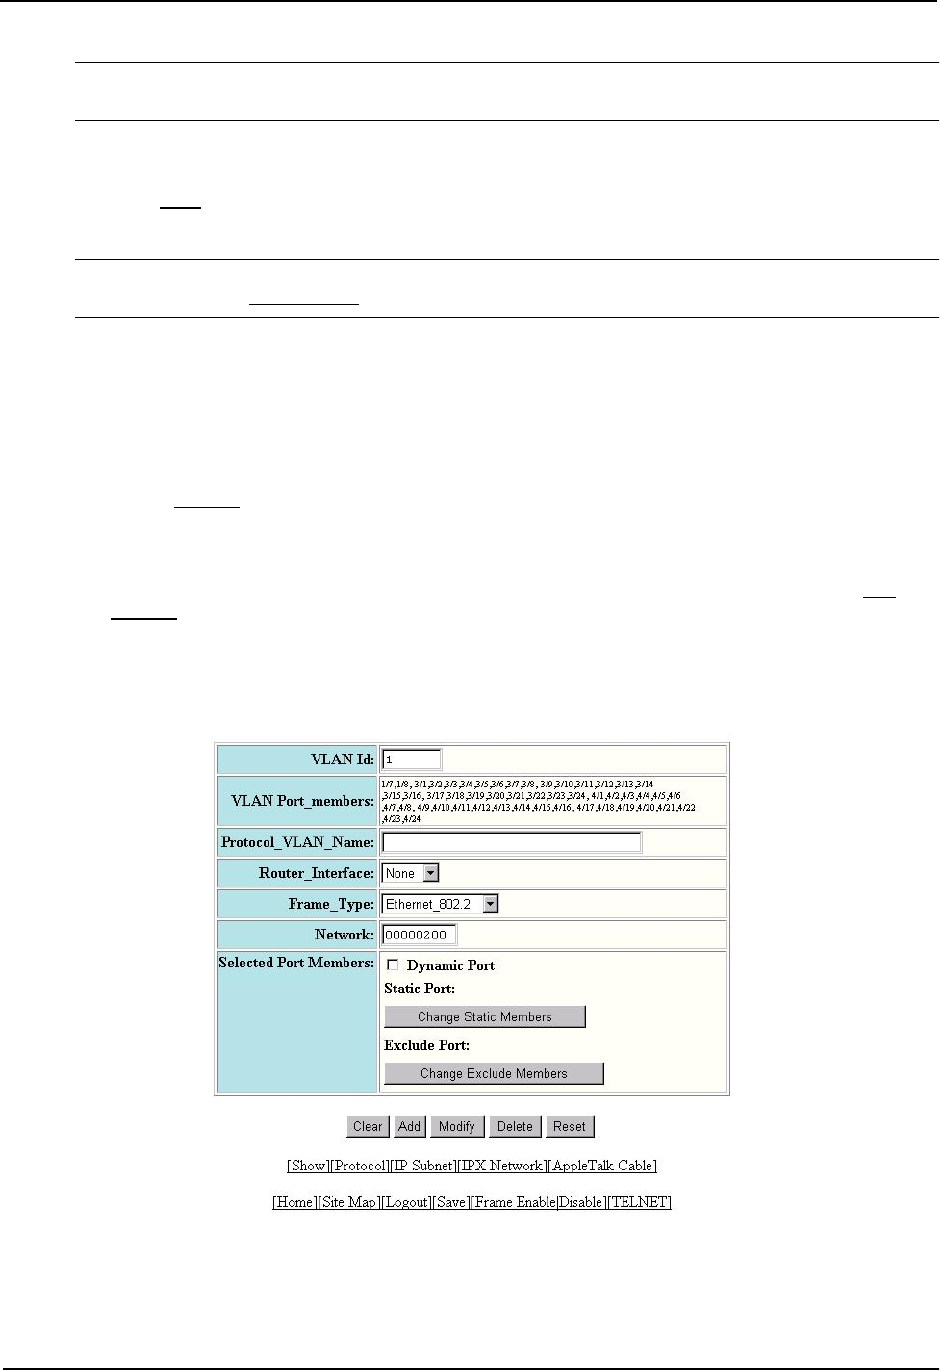
• If the device does not have any protocol VLANs, the Protocol VLAN configuration panel is displayed, as
shown in the following example.
• If at least one protocol VLAN is already configured and you are adding a new one, click on the IPX
Network link to display the IP Sub-net Protocol VLAN configuration panel.
• If you are modifying an existing protocol VLAN, click on the Modify button to the right of the row
describing the VLAN to display the configuration panel for the type of VLAN you are modifying. The
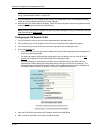
following example shows the IPX Network Protocol VLAN configuration dialog, used for configuring an
IPX network protocol VLAN (not a protocol, IP sub-net, or AppleTalk cable VLAN)
5. Enter the VLAN ID that will contain the IPX network VLAN in the VLAN ID field.
6. Enter a name for the VLAN in the Protocol_VLAN_Name field.
16 - 54