


16 Installation, cabling, and setup
Installing a new card
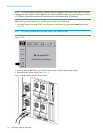
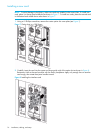
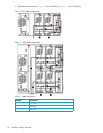
NOTE: To avoid damage to the library, make sure cards are installed in the correct slots. To install one
card, place it in the top level middle slot as shown in Figure 7. To install two cards, place the second card
in the bottom level middle slot as also shown in Figure 7.
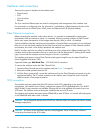
1. Using a #1 Phillips screwdriver, remove the center option slot cover plate (see Figure 7).
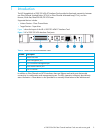
Figure 7 Option slots in a 10U library
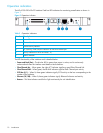
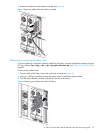
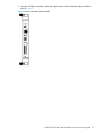
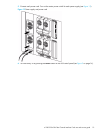
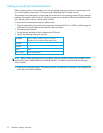
2. Carefully insert the card into the upper and lower guide rails of the option slot as shown in Figure 8.
Resistance is felt as the card connects with the library backplane. Apply only enough force to seat the
card snugly, then rotate the ejector handles inward.
Figure 8 Installing the interface card