


Calibrate the scanner
NOTE: Calibrate the scanner when the ADF is removed or replaced.
Calibrate the scanner to compensate for offsets in the scanner imaging system (carriage head) for ADF
and flatbed scans. Because of mechanical tolerances, the scanner's carriage head might not read the
position of the image accurately. During the calibration procedure, scanner offset values are calculated
and stored. The offset values are then used when producing scans so that the correct portion of the
document is captured.
Scanner calibration should be carried out only if you notice offset problems with the scanned images,
or if you remove or replace the ADF. The scanner is calibrated before it leaves the factory. It needs to
be calibrated again only rarely.
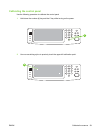
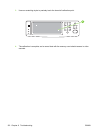
1. From the Home screen, touch Administration.
2. Touch Troubleshooting.
3. Place the calibration sheet that came with the digital sender on the flatbed scanner.
4. Touch Calibrate Scanner and then follow the instructions in the onscreen dialog box.
The device starts the calibration process, and Calibrating appears on the touchscreen status line
until the process is complete.
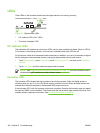
To print the calibration target
1. If you do not have the calibration sheet that came with the digital sender, touch Download Drivers
and Software and select any Windows operating system (Calibration Page is located in the Utility
menu). Also, the HP Digital Sender 9200c and HP Digital Sender 9250c calibration pages are the
same and can be used for either scanner. The file name is CALIBRATION.PDF or
CALIBRATION.DOC. See
www.hp.com/go/9200c_scanner_cal for more information.
2. Print the target on any HP LaserJet printer or another available, laser-quality printer.
a. Verify that the page size in the software program is set to legal, and do not make any
adjustments to the image size.
NOTE: Ignore any printer errors that might appear about using incorrect paper size.
By selecting legal as the page size and printing on letter or A4 paper, the file prints to
the edge of the paper.
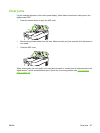
b. Place letter or A4 paper in tray 1 (or the multipurpose tray) and adjust the side guides.
c. Print the first pass of the calibration target. (First copy of the file.)
d. Return the first pass of the calibration target to tray 1 so that the arrows are facing into the
printer.
ENWW Calibrate the scanner 129