


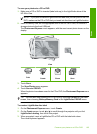


8. Touch or to decrease or increase the brightness of the photo.
The current brightness selection is indicated by the vertical line on the slidebar.
9. When you are done adjusting brightness, touch Done.
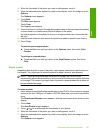
To preview your edited photo
▲ Touch the Back icon until you return to the Options menu, then touch Print
Preview.
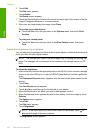
To print your edited photo
▲ Touch the Back icon until you return to the View Photos screen, then touch
Print.
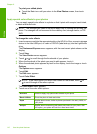
Print a frame around your photo
You can print a decorative colored border around the outside edge of your photo to frame
the photo.
NOTE: The changes you make to the photo apply only to viewing and printing the
photo. The changes will not be saved on the memory card, storage device, or CD/
DVD.
To print a frame around your photo
1. Insert a memory card into the appropriate slot on the HP All-in-One, connect a storage
device to the front USB port, or insert a CD/DVD (label side up) into the LightScribe
drive.
The Photosmart Express menu appears, with the most recent photo shown on the
display.
2. Touch View.
The View Photos screen appears.
3. Touch
or to scroll through the thumbnails of your photos.
4. When the thumbnail of the photo you want to edit appears, touch it.
5. When the selected photo appears by itself on the display, touch the image or touch
Options.
The Options menu appears.
6. Touch Edit.
The Edit menu appears.
7. Touch Add Frame.
The Select Creative Frame screen appears.
8. Touch
or to scroll through the frames until you find the one you want, and then
touch the frame.
The selected frame is applied to the photo and shown by itself on the display.
To preview your edited photo
▲ Touch the Back icon until you return to the Options menu, then touch Print
Preview.
Edit photos using the control panel 109
Photos