


• Do not clean the print head unnecessarily. This wastes ink and shortens the life of
the cartridges.
• Handle ink cartridges carefully. Dropping, jarring, or rough handling during installation
can cause temporary printing problems.
Information on paper
The HP All-in-One is designed to work well with most paper types. Test a variety of paper
types before buying a large quantity. Find a paper type that works well and is easy to
purchase. HP Premium papers are designed for the best quality results. In addition, follow
these tips:
• Do not use paper that is too thin, that has a slick texture, or that stretches easily. It
can feed incorrectly through the paper path, causing paper jams.
• Store photo media in its original packaging inside a resealable plastic bag on a flat
surface in a cool, dry place. When you are ready to print, remove only the paper you
plan to use immediately. When you have finished printing, return any unused photo
paper to the plastic bag.
• Always hold photo paper by the edges. Fingerprints on photo paper can reduce print
quality.
• Do not use paper that is heavily textured. It can cause graphics or text to print
improperly.
• Do not combine different paper types and paper sizes in the input tray; the entire stack
of paper in the input tray must be the same size and type.
• Store printed photos under glass or in a storage book to prevent bleeding over time
from high humidity. Use HP Premium Plus photo paper for maximum performance.
Clear paper jams
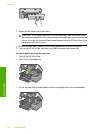
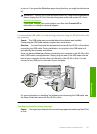
If the HP All-in-One has a paper jam, first check the rear door. If the jammed paper is not
in the rear rollers, check the top door.
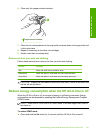
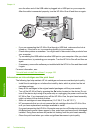
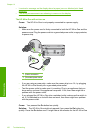
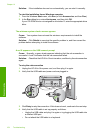
To clear a paper jam from the rear door
1. Turn off the HP All-in-One.
2. Press in the tab on the rear door to release the door. Remove the door by pulling it
away from the HP All-in-One.
CAUTION: Trying to clear a paper jam from the front of the HP All-in-One can
damage the print mechanism. Always access and clear paper jams through the
rear door.
Troubleshooting tips 147
Troubleshooting