


2-12 Removal and Replacement HP OmniBook XE2
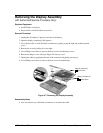
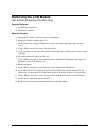
Removing the LCD Module
(HP Authorized Service Providers Only)
Required Equipment
• Small Phillips screwdriver.
• Pointed knife or probe.
Removal Procedure
1. Unplug the AC adapter, if present, and remove the battery.
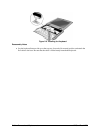
2. Remove the display assembly (page 2-11).
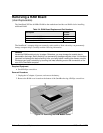
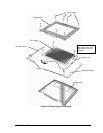
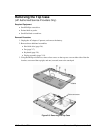
3. On the display bezel, using a pointed knife or probe, remove the eight upper and lower screw
covers.
4. Using a Phillips screwdriver, remove the eight screws.
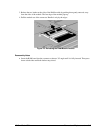
5. Using your fingers at each side of the bottom of the display bezel, slide the bezel toward you until
it unsnaps.
6. Lift up the bottom of the bezel and lift it off.
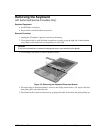
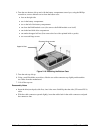
7. Using a Phillips screwdriver, remove the four screws holding the LCD brackets and hinges near
the bottom corners of the display case.
8. Remove the hinges.
9. Using a Phillips screwdriver, remove the four screws holding the LCD brackets.
10. Lift out the LCD module, including the right and left LCD brackets and the inverter PCA. (In
some models, the inverter PCA is at the bottom of the LCD module; in others, to the right side.)
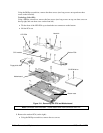
11. Using a Phillips screwdriver, remove the four screws holding the brackets to the LCD module.
12. Unplug the two cables from the inverter PCA.
13. Remove the four side screws holding the brackets to the LCD module.