


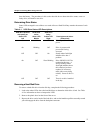
Chapter 4: Installing Mass Storage Devices
35
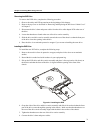
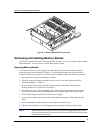
Installing the Front Panel Board
The Front Panel Board displays server information. The module is attached to the front of the Hard
Disk Bay, which must first be removed to gain access to the Front Panel Board.
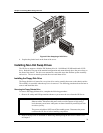
Removing the Front Panel Module
To remove the Front Panel module, complete the following procedure:
1. Turn off the system by using the power on/off switch on the front of the chassis and remove
both AC power cords.
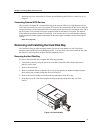
2. Remove the Hard Disk Bay from the chassis as described in “Removing the Hard Disk Bay”
earlier in this chapter.
3. Disconnect the cable to the Front Panel Board that is attached to the front of the Hard Disk Bay
by squeezing the cable retention levers together. You do not have to remove the rear part of
the cable.
4. Remove the two screws securing the Front Panel Board to the front panel mounting on the
Hard Disk Bay. These screws are located on the inside of the Front Panel Board.
5. Remove the Front Panel Board from the Hard Disk Bay assembly and place it on an ESD
protected work surface.
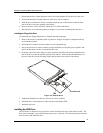
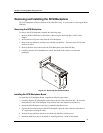
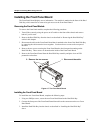
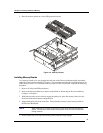
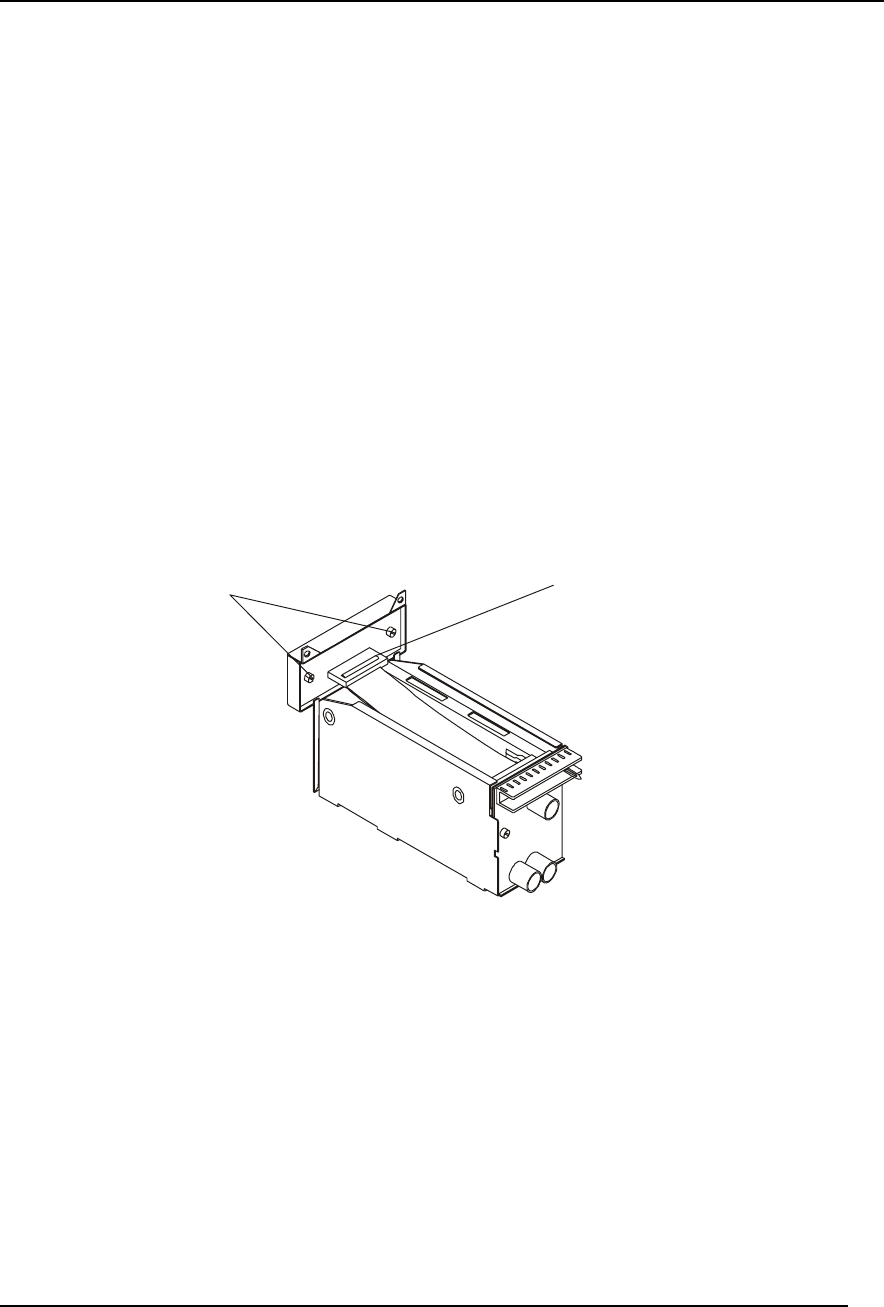
1. Disconnect the cable.
2. Remove the two screws.
Figure 4-7 The Front Panel Board
Installing the Front Panel Board
To install the new Front Panel Board, complete the following steps:
1. Using two Phillips screws, secure the new Front Panel Board to the Hard Disk Bay.
2. Connect the front part of the Front Panel Board data cable to the connector on the new Front
Panel Board.
3. Install the Hard Disk Bay into the chassis as described in “Installing the Hard Disk Bay”
above.