


26
Basics
Syncing
Congure Sync Options
You can congure synchronization options for any of your apps. You can also decide what kinds of data
to synchronize for each account.
For some accounts, syncing is two-way; changes that you make to the information on your Sero 7 are
made to the copy of that information on the web. Your Google Account works this way. Other accounts
support only one-way sync: the information on your mobile device is read-only.
Congure Auto-sync for All Apps
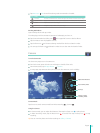
To control Auto-sync for all apps that use it, tap sync icon
at Power control to turn it on / o.
If you turn off Auto-sync, you need to sync manually to collect messages, email, and other recent
information, and won’t receive notications when updates occur. For example, changes that you make
in your People app are automatically made to your Google contacts on the web.
NOTE
Leaving Auto-sync off can help extend your battery life, but will prevent you from receiving
notications when updates occur.
Congure Google Account Sync Settings
To adjust a single Google Account’s sync settings:
1. Go to Settings > Personal > Accounts > Google.
indicates that none of an account’s information is congured to sync automatically.
indicates that some or all of an account’s information is congured to sync automatically.
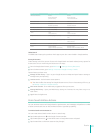
2. Tap the account whose sync settings you want to change.
3. The Sync Settings screen opens, displaying a list of the kinds of information the account can sync.
4. Tap items as needed.
Unchecking an option does not remove the information from your Sero 7; it simply stops it from being
kept in sync with the version on the web.
Sync a Google Account Manually
1. Go to Settings > Accounts > Google.
2. Tap the account whose data you want to sync.
3. Tap Menu icon
> Sync now.
Tip: None of an account’s information is congured to sync automatically.