


47
Wired LAN
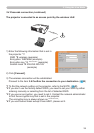
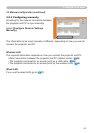
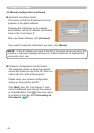
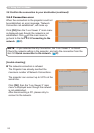
3.5 Manual conguration (continued)
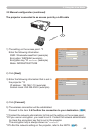
IP address : 192.168.1.10 (example)
Subnet mask : 255.255.255.0 (example)
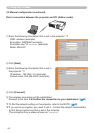
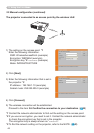
2) Click [Connect].
3) The network connection will be established.
Proceed to the item 3.6 Conrm the connection to your destination. (
50)
1) Enter the following information for the
projector. *1
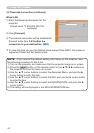
Consult to the network administrator. Log in the Windows under Administrator
authority. After that, please resume at the item 3.3.1 Starting the “Live Viewer
3”. (
26)
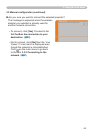
3. Using the Live Mode
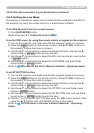
[trouble shooting]
n A network connection could not be established.
Windows prevented network conguration
changes.
You may log in the Windows under User
authority.
Click [OK], then the “Live Viewer 3” main
menu is displayed even though the network
is not established. Click
on the main menu
and go back to the item 3.3.3 Connecting to
the network. (31)
*1 To nd the network setting on the projector, refer to the NOTE. (
40)