


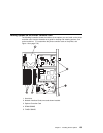
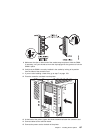
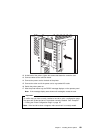
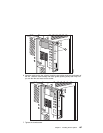

12. At the back of the printer, tighten the screws that fasten the controller card.
13. Connect cables to the controller board.
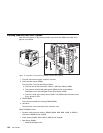
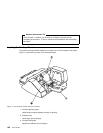
14. Connect the power cord to the back of the printer.
15. Connect the other end of the power cord to a grounded AC outlet.
16. Switch the printer power on.
17. After the printer warms up, the READY message displays on the operator panel.
Note: If the message display area shows solid rectangles, reseat the card.
Important
To confirm that you have correctly installed a hard drive, print a configuration page.
The report will list the hard drive if it has been correctly installed. See “Example 1
— Printing the Printer Configuration Page” on page 32.
Note: If the hard drive does not appear, make sure that it is correctly seated.
Chapter 7. Installing Printer Options 161