


Installation overview
Use the following general steps to install your console switch:
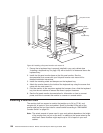
1. Install the console switch in your rack cabinet:
v Install a console switch inside the rear storage compartment of a NetBAY
monitor shelf, “Installing a console switch horizontally in a rack” on page 128
OR
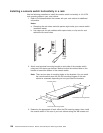
v Install a console switch vertically in the side of your rack cabinet according to
“Installing a console switch vertically in a rack”, OR
v Install a console switch horizontally in 1U of EIA rack mounting space in your
rack cabinet.
2. If you have more than one console switch to install in your rack cabinet repeat
step 1 for each console switch see, “Installation overview” on page 146.
3. Refer to the Apex User Guide CD for operation and configuration information.
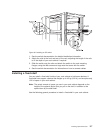
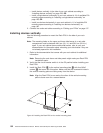
Installing a console switch vertically in a rack
Use the following procedure to install the console switch vertically in the side of
your rack cabinet:
Note: The mounting holes on upper and lower side braces in a rack side
compartment must be between 50.8 cm (20.0 in.) and 57.3 cm (22.6 in.)
apart. If your rack cabinet has movable side braces, refer to your rack
documentation for information about relocating your side braces if they are
not already spaced for this installation.
1. Refer to the documentation that comes with your rack cabinet for additional
information.
Note: Removing the rack doors and side panels might make your console
switch installation easier.
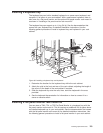
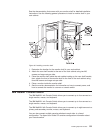
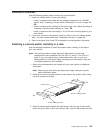
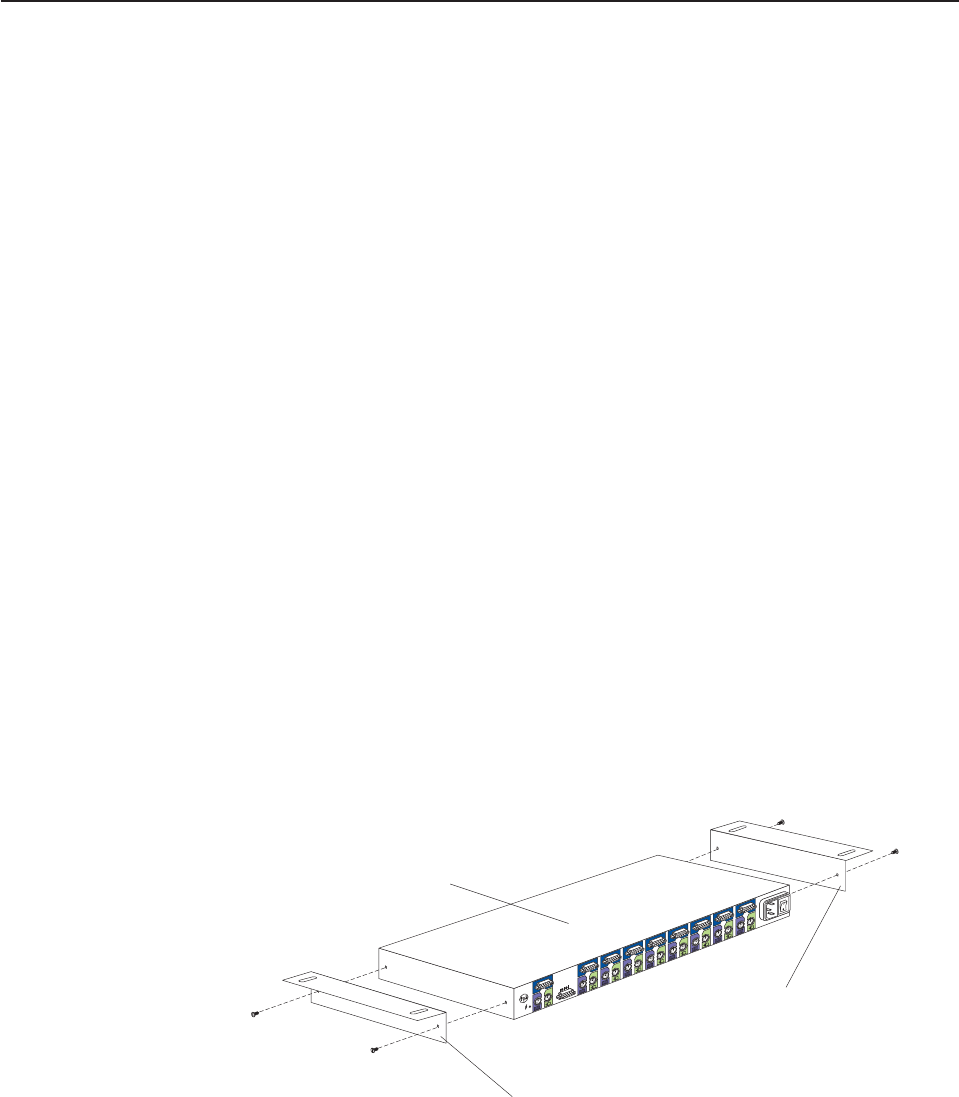
2. Attach one vertical mounting bracket to each side of the console switch using
two 8-32 screws per bracket.
8
1
A
2
3
4
5
6
7
Vertical mounting bracket
Vertical mounting bracket
Console switch
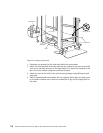
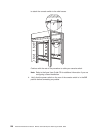
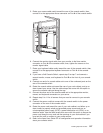
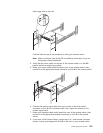
3. Hold the console switch against the side braces, with the rear of the console
switch facing the back of your rack cabinet; then, use four M6 screws and nuts
Installing Optional Devices 125