


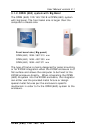
User Manual version 2.1
OPEN (660) 120/140/150
3-33
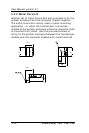
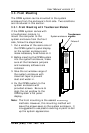
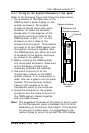
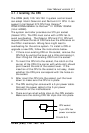
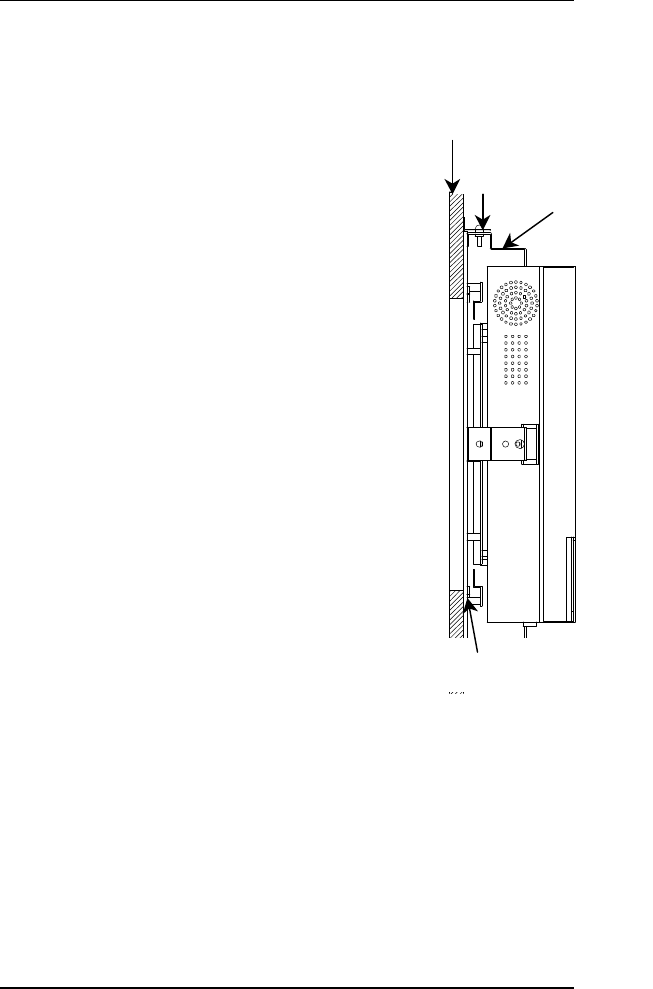
3.4.1. Fixing on the System Enclosure’s front panel
Refer to the following figure and follow the steps below.
1. Cut a window of the same size of the
OPEN system’s panel display on the
system enclosure. The system
enclosure should come with some
brackets. To make the brackets,
please refer to the diagram of the
dimension and fixing holes of the
OPEN system in Sec. 1.4. Fix the
brackets on the 4 sides of the
enclosure’s front panel. The brackets
are used to fix the OPEN system and
the system enclosure together later.
The OPEN system can either be fixed
to brackets of the system enclosure
by screws or by soldering.
2. Before inserting the OPEN system
into the system enclosure, make sure
all the hardware jumpers and
necessary software are installed.
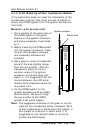
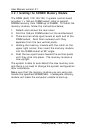
3. Use metal fixture A to fix the
touchscreen module to the OPEN
system chassis. If no touchscreen is
used, then put a glass or acrylic piece
instead. The touchscreen module
frame is still needed to fix the
transparent piece to the computer.
4. Screw the brackets on the system
enclosure and the metal fixture A on
the OPEN system chassis together
with provided screws.
Note: The suggested thickness of the glass or acrylic used
for the transparent piece is between 2mm to 5mm
depending on the bronze stick height. If the system
is to be put in public area, it is suggested to use
resilient glass or acrylic to protect the LCD display.
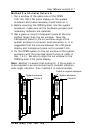
System enclosure
Bracket on the
System enclosure
Fixture A
Touchscreen
module