27
4
BEGIN SOURCE PLAYBACK
Fast-forward or rewind the source tape to find
the desired scene, then start playback a little
before the scene.
5
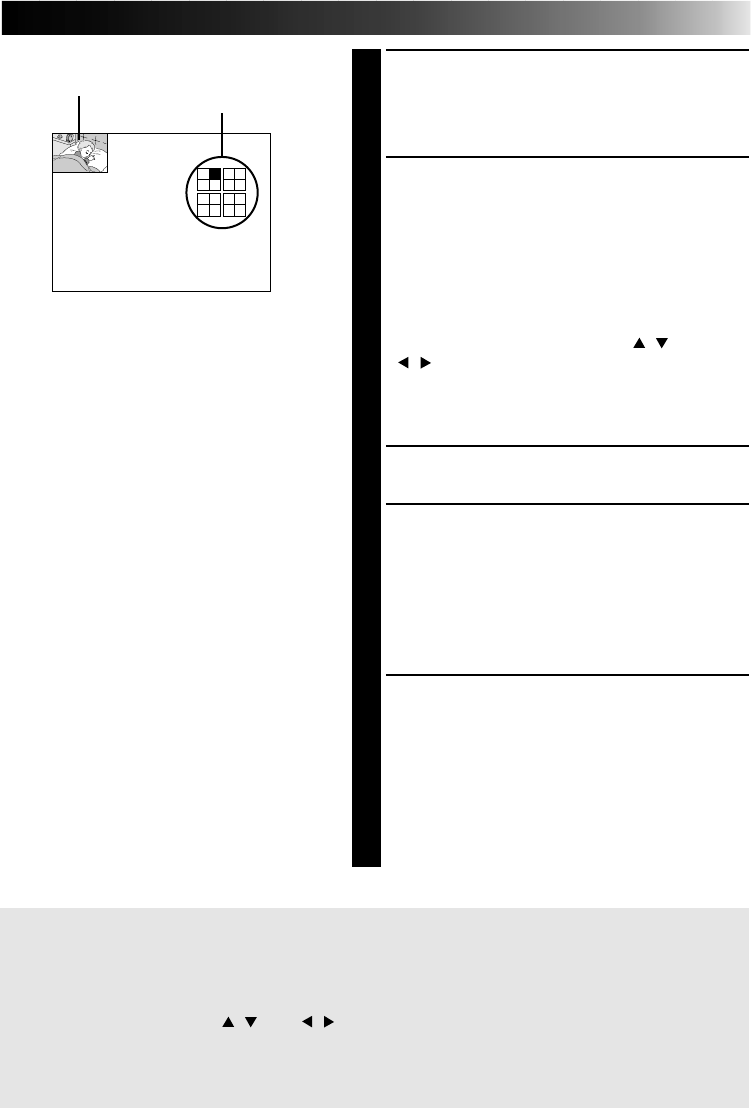
PRESS MEMORY WHEN THE DE-
SIRED IMAGE APPEARS
•The image is stored in memory and appears
in the upper lefthand corner of the screen.
•The next position to be stored in memory
appears in all white in the upper righthand
corner of the screen.
•You can select which position to store next
by pressing the cursor buttons
/
and
/
.
•With ON SCREEN set to OFF on the
PRINTER MENU (Page 22), only the position
stored in memory appears on the display.
6
PRESS SOURCE TO CALL UP THE
INPUT DISPLAY
7
REPEAT STEPS
5
AND
6
FOR EACH
IMAGE YOU ARE GOING TO PRINT
(4 OR 16) AND STORE THEM
•In order to superimpose titles and masking,
see pages 40 through 45. Title imposing or
masking is done across the entire screen, not
on each image separately.
8
PRESS PRINT
•Print Lamp blinks, indicating that printing
has started.
•“Now printing!!” appears on screen during
printing.
•When the printed sheets are delivered to the
output tray and “Now printing!!” disappears,
printing is complete. Do not leave more
than 25 printed sheets stacked on the tray.
Display of stored position
Image stored
FRAME STABILIZER
If MEMORY display is not stable, press F.STABILIZER button to call up “F.STABILIZER ON”
on TV screen.
If you store the wrong image or store an image incorrectly ...
1 Press the cursor buttons
/
and
/
, and select the image you want to change.
● The position stored appears in white in the upper righthand corner of the screen.
2 Press SOURCE to call up the INPUT display and store a new image.
● The wrong image is deleted and the new image is stored in memory.


