EN 7
INITIALIZATION
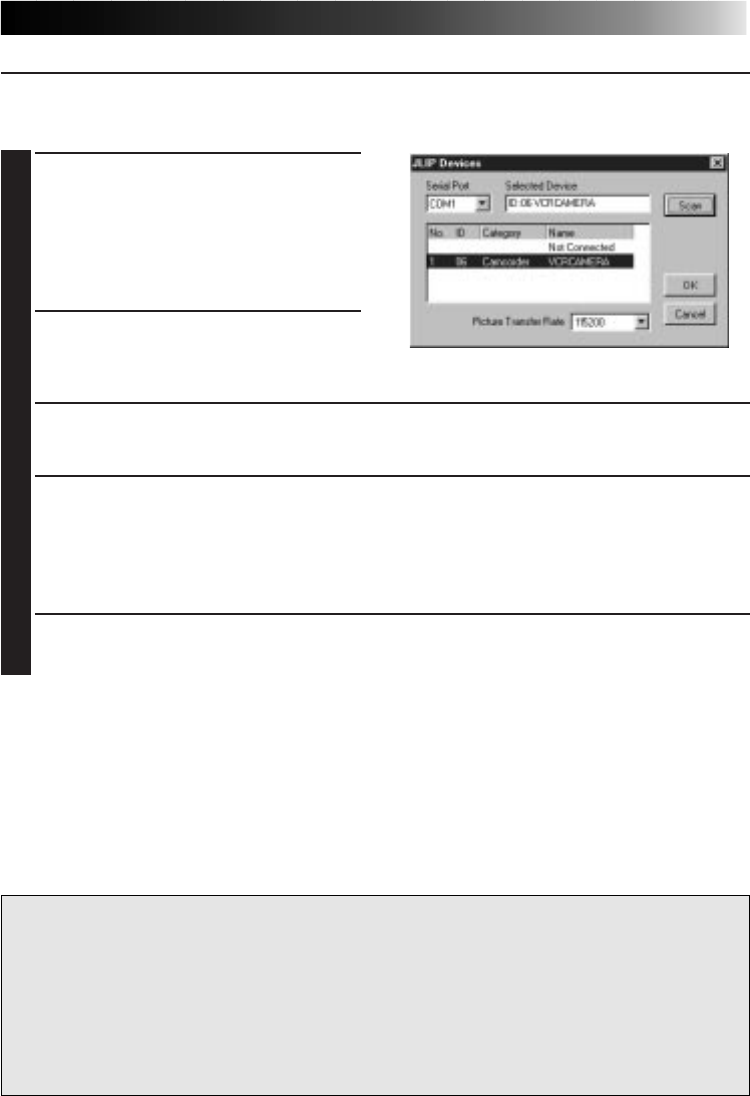
SELECTING THE CONNECTED DEVICE
You can use the JLIP Devices window to select a video source unit connected to one of the
COM ports (RS-232C) after starting up JLIP Video Capture, or when you connect a different
video source unit.
1
Select Window — DV Controller in the
Index window.
• The JLIP Devices window opens.
• You can also select Preferences —
Devices in the DV Controller window
to open the JLIP Devices window.
2
Select the Serial Port (COM 1 to COM 4).
• Select the COM port the video source
unit is connected to.
3
Click Scan.
• When the connected video source unit is detected, its name appears in the window.
4
Select the Picture Transfer Rate.
• Set it to 115200.
• Depending on your PC’s specifications, the software may not function properly when
this speed is selected. If an error occurs during use, set it to a slower rate (38400 or
less).
5
Click OK.
• The DV Controller window appears after setting is completed.
NOTE
If the video source unit is not detected, follow the procedures below.
1 Confirmed that the COM port the video source unit is connected to is selected in the JLIP
Devices window.
2 Check the connections.
3 Set the video source unit’s Power Dial to PLAY or PLAY/PC.
4 Click Scan in the JLIP Devices window.
5 If the video source unit appears in the window, click OK (setting is completed).
CAUTION
• If you are using a built-in modem or IrDA, the RS-232C COM port may be occupied. In
this case, click the right button of the mouse to select My Computer, then select Properties
— System Properties — Device Manager. Click Ports (COM & LPT) to confirm which
COM port is available. If all the COM ports are occupied, set the COM port used by the
modem or IrDA driver to Invalid.
• If a USB or Digital Still Camera driver is installed on your PC, you may not be able to use
the RS-232C port.
• Depending on your PC’s specifications, you may need to change the BIOS settings.


