


EN 9
3
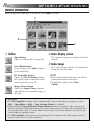
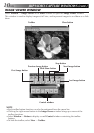
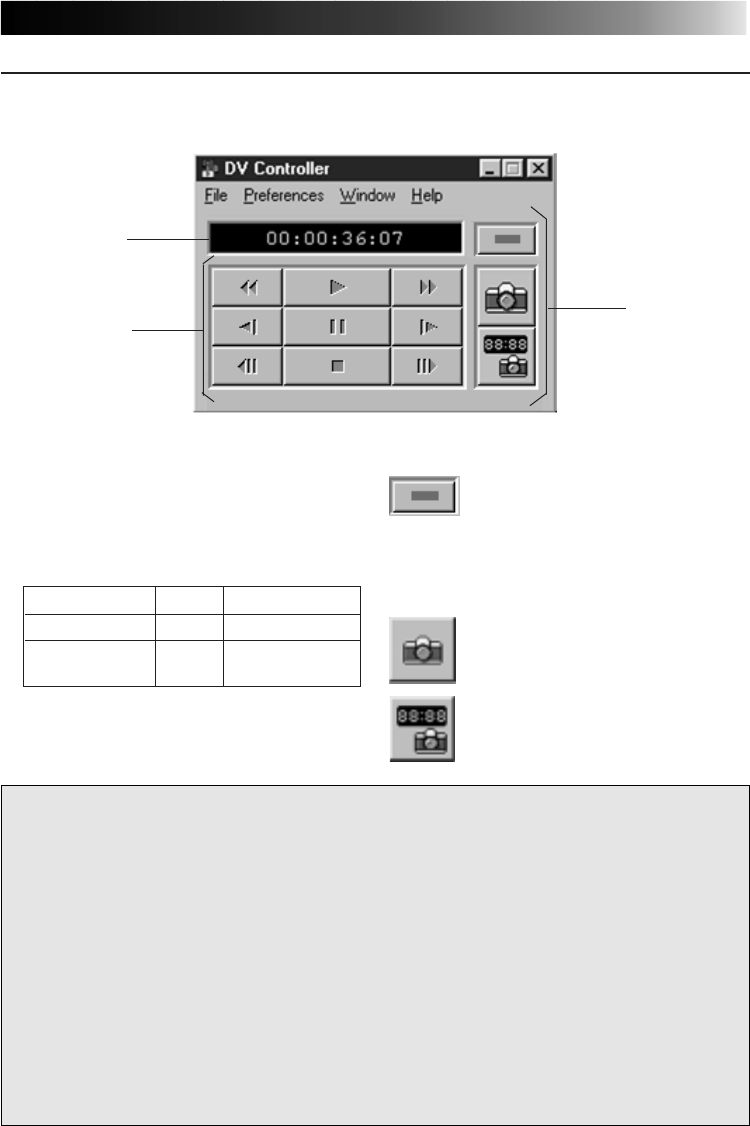
Operation Buttons
Power button
Displays the power status of the
connected video source unit. Note
that, depending on the video deck
connected, it may not be possible
to turn its power on and off.
Capture button
Captures the desired playback
image.
Automatic Capture button
Controls the playback of the video
source unit and captures specified
playback images.
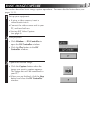
DV CONTROLLER WINDOW
Select Window — DV Controller in the Index window to open the DV Controller window.
This window is used to capture still images from a video source unit.
CAUTION
• Use only the operation buttons in the DV Controller window to control the video source
unit. If you operate the video source unit with its own operation buttons, the appearance
of the DV Controller window may not correspond to the status of the video source unit, or
it may cause a malfunction to occur in JLIP Video Capture.
• The DV Controller window may appear to still be operating the video source unit even
after the videocassette automatically stops at the beginning or end of the tape. In this case,
click the Stop button in the DV Controller window before performing another operation.
• If an image is captured in the Pause or Slow Play mode, some noise may appear on the
captured image. In this case, capture the image during normal playback.
• If videotape being used is damaged, some noise may appear in the playback image in the
DV Controller window.
• Automatic Capture cannot be performed in the time code range of 00:00:00:00 and
00:00:30:00 in the DV Controller window.
• Depending on your PC’s or video source unit’s specifications, the DV Controller window
may not function.
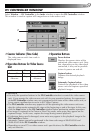
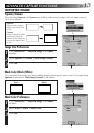
1
Counter Indicator (Time Code)
The video source unit’s time code is
displayed here.
2
Operation Buttons for Video Source
Unit
Rewind Play Fast Forward
Reverse Slow Pause Forward Slow
Reverse Frame Stop Forward Frame
Advance Advance
3
2
1