


42
IEOVMCIP
L
mc 00 5
.
0asf R
PAGE B
A
CK
REVIE
W
DELE
T
E
PROTEC
T
SELEC
T
OF
F
FTP S
E
N
D
FTP SEND
IEOVMCIP
L
mc 00 5
.
0asf WR/
REVIE
W
DELE
T
E
PROTECT
PAGE B
A
C
K
SELEC
T
OF
F
FTP S
E
N
D
FTP SEND
SYSTEM . .
MENU
REMOTE .
.
AUD IO . .
VIDEO. .
TC/UB/ CLOCK . .
DISPLAY SET. .
..
E
MOV I CL I P . .
N
E
TWO
R
KPACKCONFIG
E
X
I
T
mc 00 5
.
0asf WR/
IEOVMCIP
L
02 03/02/
09 0 0:00:
mc 00 6
.
0asf WR/
02 03/02/
09 3 0:25:
mc 00 7
.
0asf WR/
02 03/02/
10 1 0:55:
mc 00 8
.
0asf WR/
02 03/02/
11 0 0:00:
PAGE B
A
CK
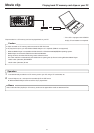
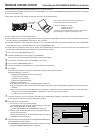
BR-DV6000
PROFESSIONAL
MENU RESET
A.DUB
EJECT
COUNTER
AUDIO INPUT
SELECT
MONITOR OUTPUT REMOTE
LOCAL
CTL L
MIX
R
CH-1/2
MIX
CH-3/4
DV
LINE
Y/C
(CPN)
TC
UB
REW STOP FF
REC
OPERATE
PLAY PAUSE
DISP
SET SEARCH+
BLANK CUE UP
HOLD
PHONES REC LEVEL
CH-1/3 CH-2/4
MIC
SEARCH–
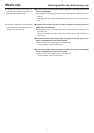
Mini
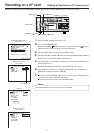
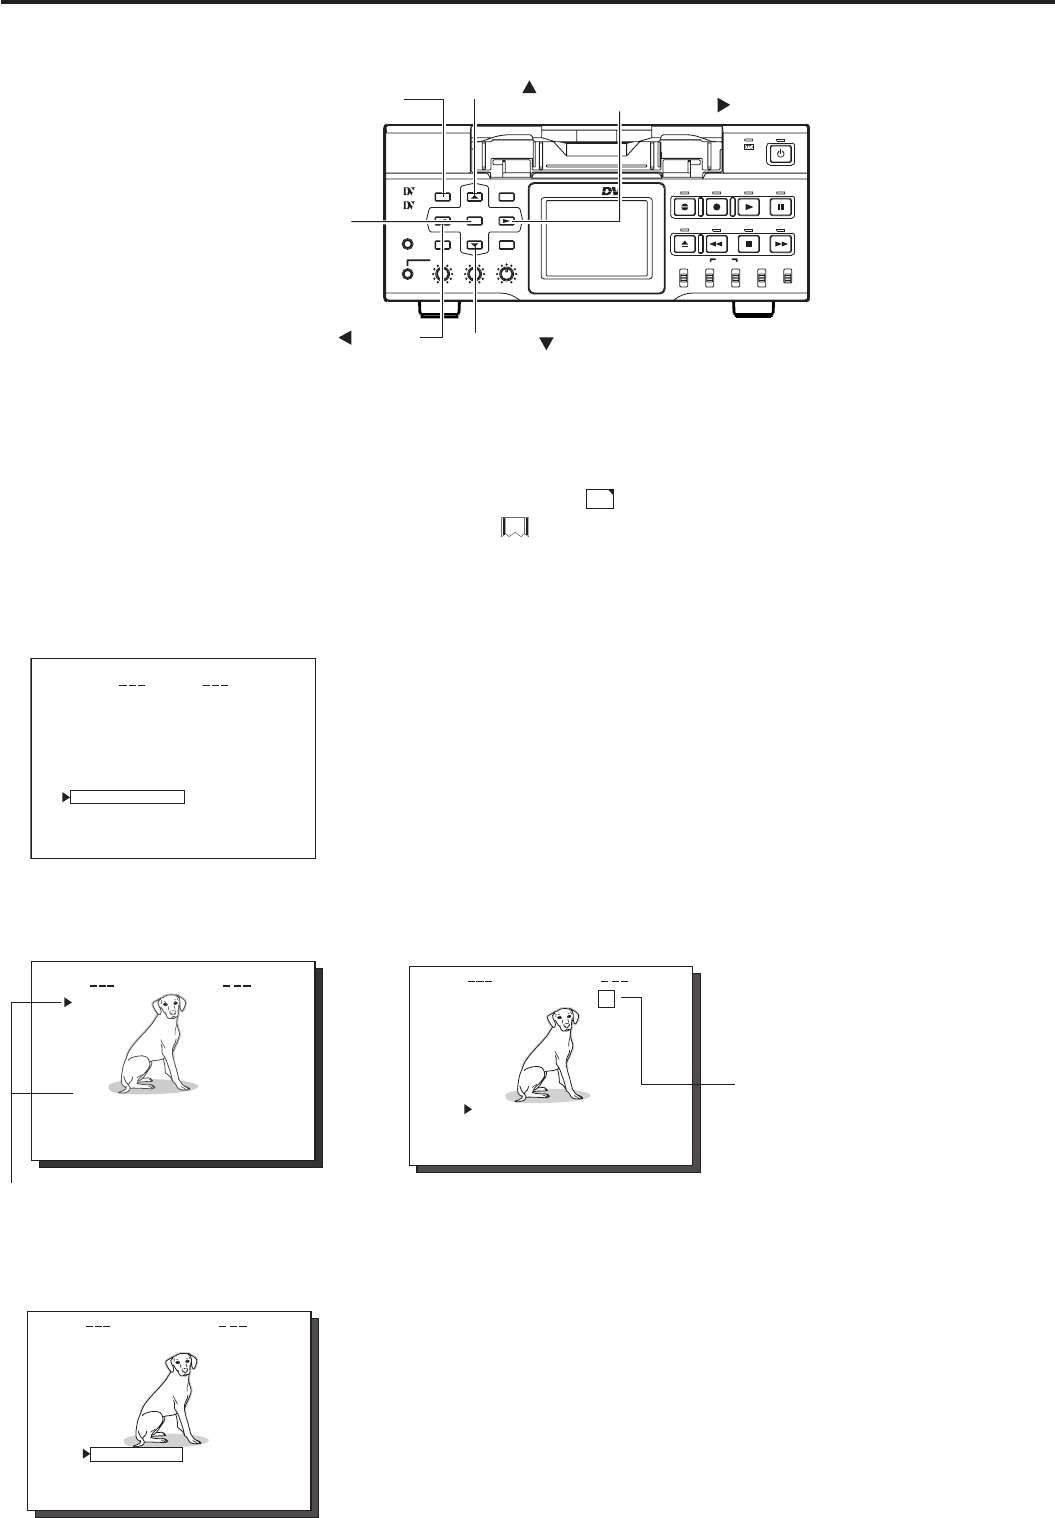
MENU button
SET button
SEARCH- (
) button
DISP (
) button
BLANK (
) button
SEARCH+ (
) button
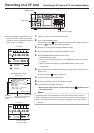
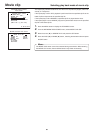
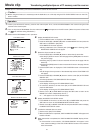
Movie clip Protecting a clip file on a CF memory card
Clips recorded on a CF memory card can be protected using the MOVIE CLIP screen.
1.
Insert an already recorded CF memory card.
2.
Turn on the BR-DV6000 power.
Check to see that the
C
F
display appears on the LCD screen. (When the power is
turned on, display will flash during initialization.)
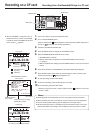
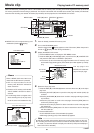
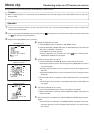
3.
Display the MOVIE CLIP screen.
q Press the MENU button to display the TOP MENU screen.
w Press the DISP (6) or BLANK (7) button, move the cursor (t) to MOVIE CLIP
and press the SET button or SEARCH+ (t) button.
● The latest page of the MOVIE CLIP screen appears.
R/W display appears on the right of the clip number.
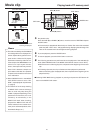
4.
Select the clip to protect.
Press the DISP (6) or BLANK (7) button, move the cursor (t) to the clip to
protect and press the SET button.
● The CLIP FUNCTION screen of the selected clip appears.
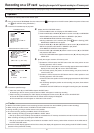
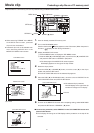
5.
Press the DISP (6) or BLANK (7) button, move the cursor to PROTECT in the
CLIP FUNCTION screen and press the SET button.
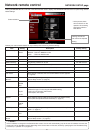
6.
To return to the MOVIE CLIP screen after completing setting, select PAGE BACK
and press the SET button or SEARCH– (8) button.
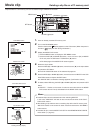
\ To cancel the protection, select PROTECT in the CLIP FUNCTION screen and
press the SET button.
● The R display will change to an R/W display and the protection on the clip will be
canceled.
● The selected clip is protected.
The R/W display on the right of the clip
number will change to an R display.
Protected
● When executing FORMAT in the MOVIE
CLIP SETUP menu screen, protected
clips will also be deleted.
● Protected clips will not be deleted even
when executing DELETE ALL in the
MOVIE CLIP SETUP menu screen.
CLIP FUNCTION screen
TOP MENU screen
MOVIE CLIP screen
CLIP FUNCTION screen
Clip number