


CHAPTER 6 COPIER DEFAULT SETTING
6-7
2. How to make default settings
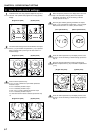
1
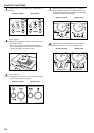
Hold down both of the copy exposure adjustment keys for 3
seconds. "F00" (default code) appears on the copy quantity
display.
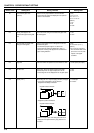
(English text panel) (Symbol panel)
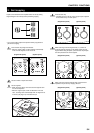
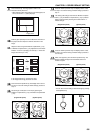
2
The default code changes each time the Number of Copies/
Zoom (+) key or Number of Copies/Zoom (-) key is pressed.
Select a default code by referring to the table shown in "1.
Default settings".
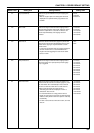
(English text panel) (Symbol panel)
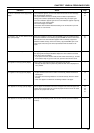
3
Press the Zoom Input/Enter key.
If "F01" or "F24" is selected, a report will be printed out.
Proceed to step 4.
If "F13" is selected, proceed to step 5.
If "F14" is selected, proceed to step 7.
If "F26", "F27" or "F28" is selected, proceed to step 9.
If "F31" is selected, proceed to step 13.
If a code other than the above is selected, proceed to step
15.
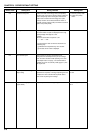
(English text panel) (Symbol panel)
4
When the report is printed out, the display returns to that for
step 2. To make other settings, perform the respective
procedures (see below). To end the making of default
settings, proceed to step 17.
5
Enter the paper width by pressing the Number of Copies/
Zoom (+) key or Number of Copies/Zoom (-) key. The paper
width can be set from 4.13" to 8.50" (105 to 216 mm).
(Inch specifications) (Metric specifications)
6
Press the Zoom Input/Enter key. The display returns to that
for step 2. To end the making of default settings, proceed to
step 17.
7
Enter the copy limit (99 copies or lower) by pressing the
Number of Copies/Zoom (+) key or Number of Copies/Zoom
(-) key.
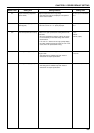
(English text panel) (Symbol panel)
8
Press the Zoom Input/Enter key. The display returns to that
for step 2. To end the making of default settings, proceed to
step 17.