


4: Configuration
Renaming xPrintServer Device
As part of the initialization process, the xPrintServer registers a Lantronix-specific Bonjour
Service Type (lantronix-ips._tcp which uses the default device name of xPrintServer).
As with any Bonjour discovery application, you can find your xPrintServer or any Bonjour-
supported web browser using the URL: http://<devicename>.local, substituting the
<devicename> with the name of the device. Therefore, you would search for your xPrintServer
device with http://xprintserver.local by default. If you change the default device name,
the xPrintServer URL used to access the xPrintServer web interface would also be modified. For
instance, if the default name xprintserver is renamed to printer1, the browser URL
address would be http://printer1.local.
Note: All Apple devices natively include Bonjour Services. MS Windows Operating Systems do
not include Bonjour Service and will require an installation of an application that includes Bonjour
Service for Windows, such as the Apple “Bonjour Print Services for Windows” or the Apple Safari
for Windows. Once Bonjour Service for Windows has been installed, the xPrintServer can be
discovered using the configured <name>.local in the web browser, as described above.
The directions below can be used to rename an xPrintServer device to whatever name the Admin
user designates. This is a useful function in situations where there are multiple xPrintServers on
a network as each device should have a unique name. Changing the xPrintServer name requires
a restart to use the new xPrintServer name.
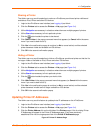
1. Login to the xPrintServer user interface (see Logging In) as the Admin user.
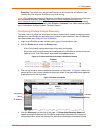
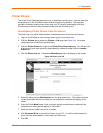
2. Click the Admin tab to access the Admin menu. A list of all available Admin user
configuration options appears to the left of the screen (see Figure 4-5).
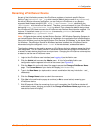
3. Click the Name link on the left side of the page to access the Change xPrintServer Name
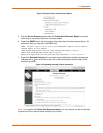
page. The Current Name of your device will display (xPrintServer).
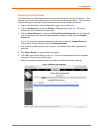
4. Type in the New Name (an alpha and/or numeric combination that may include the - and _
characters).
5. Click the Change Name button to submit the new name.
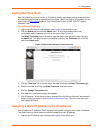
6. Click Yes in the confirmation popup to continue (or No to cancel action) renaming your
xPrintServer device.
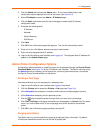
7. Wait 35 seconds. When the renaming of your unit is complete, the xPrintServer device will
automatically restart, bringing you back to the Change xPrintServer Name page where your
new device name will display.
xPrintServer User Guide 29